Laser and vinyl cuttering
I was in Paris for a conference this week so I was not at Waag when they tested and got familiar with the lasercutter. I am therefore going through Dylan and Sams documentation.
A vinylcutter can be used to cut stickers (and similar items).
A lasercutter is used to cut, mark and engrave materials. There are different techniques used for this: rasterng: moving back and forth over the material. This is used for engraving, cutting: cuts all the way through, and half tone: engraving or cutting lots of little holes (like in screen printing).
LASER stands for: Light Amplification by Stimulated Emission of Radiation.
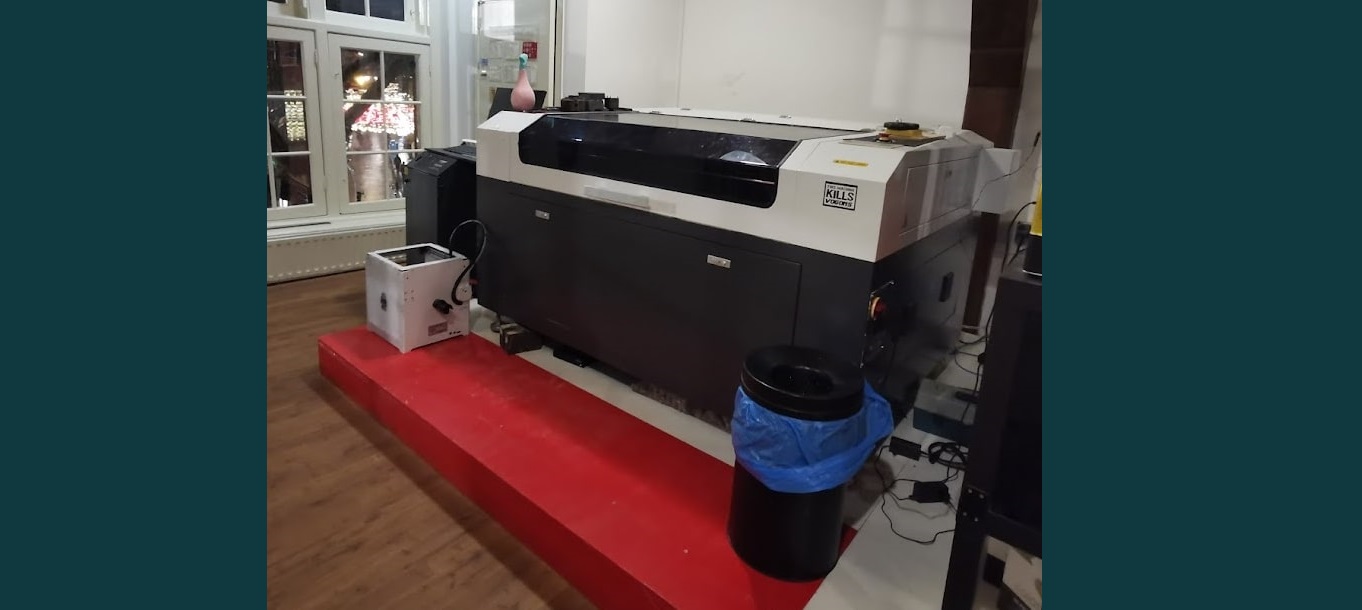
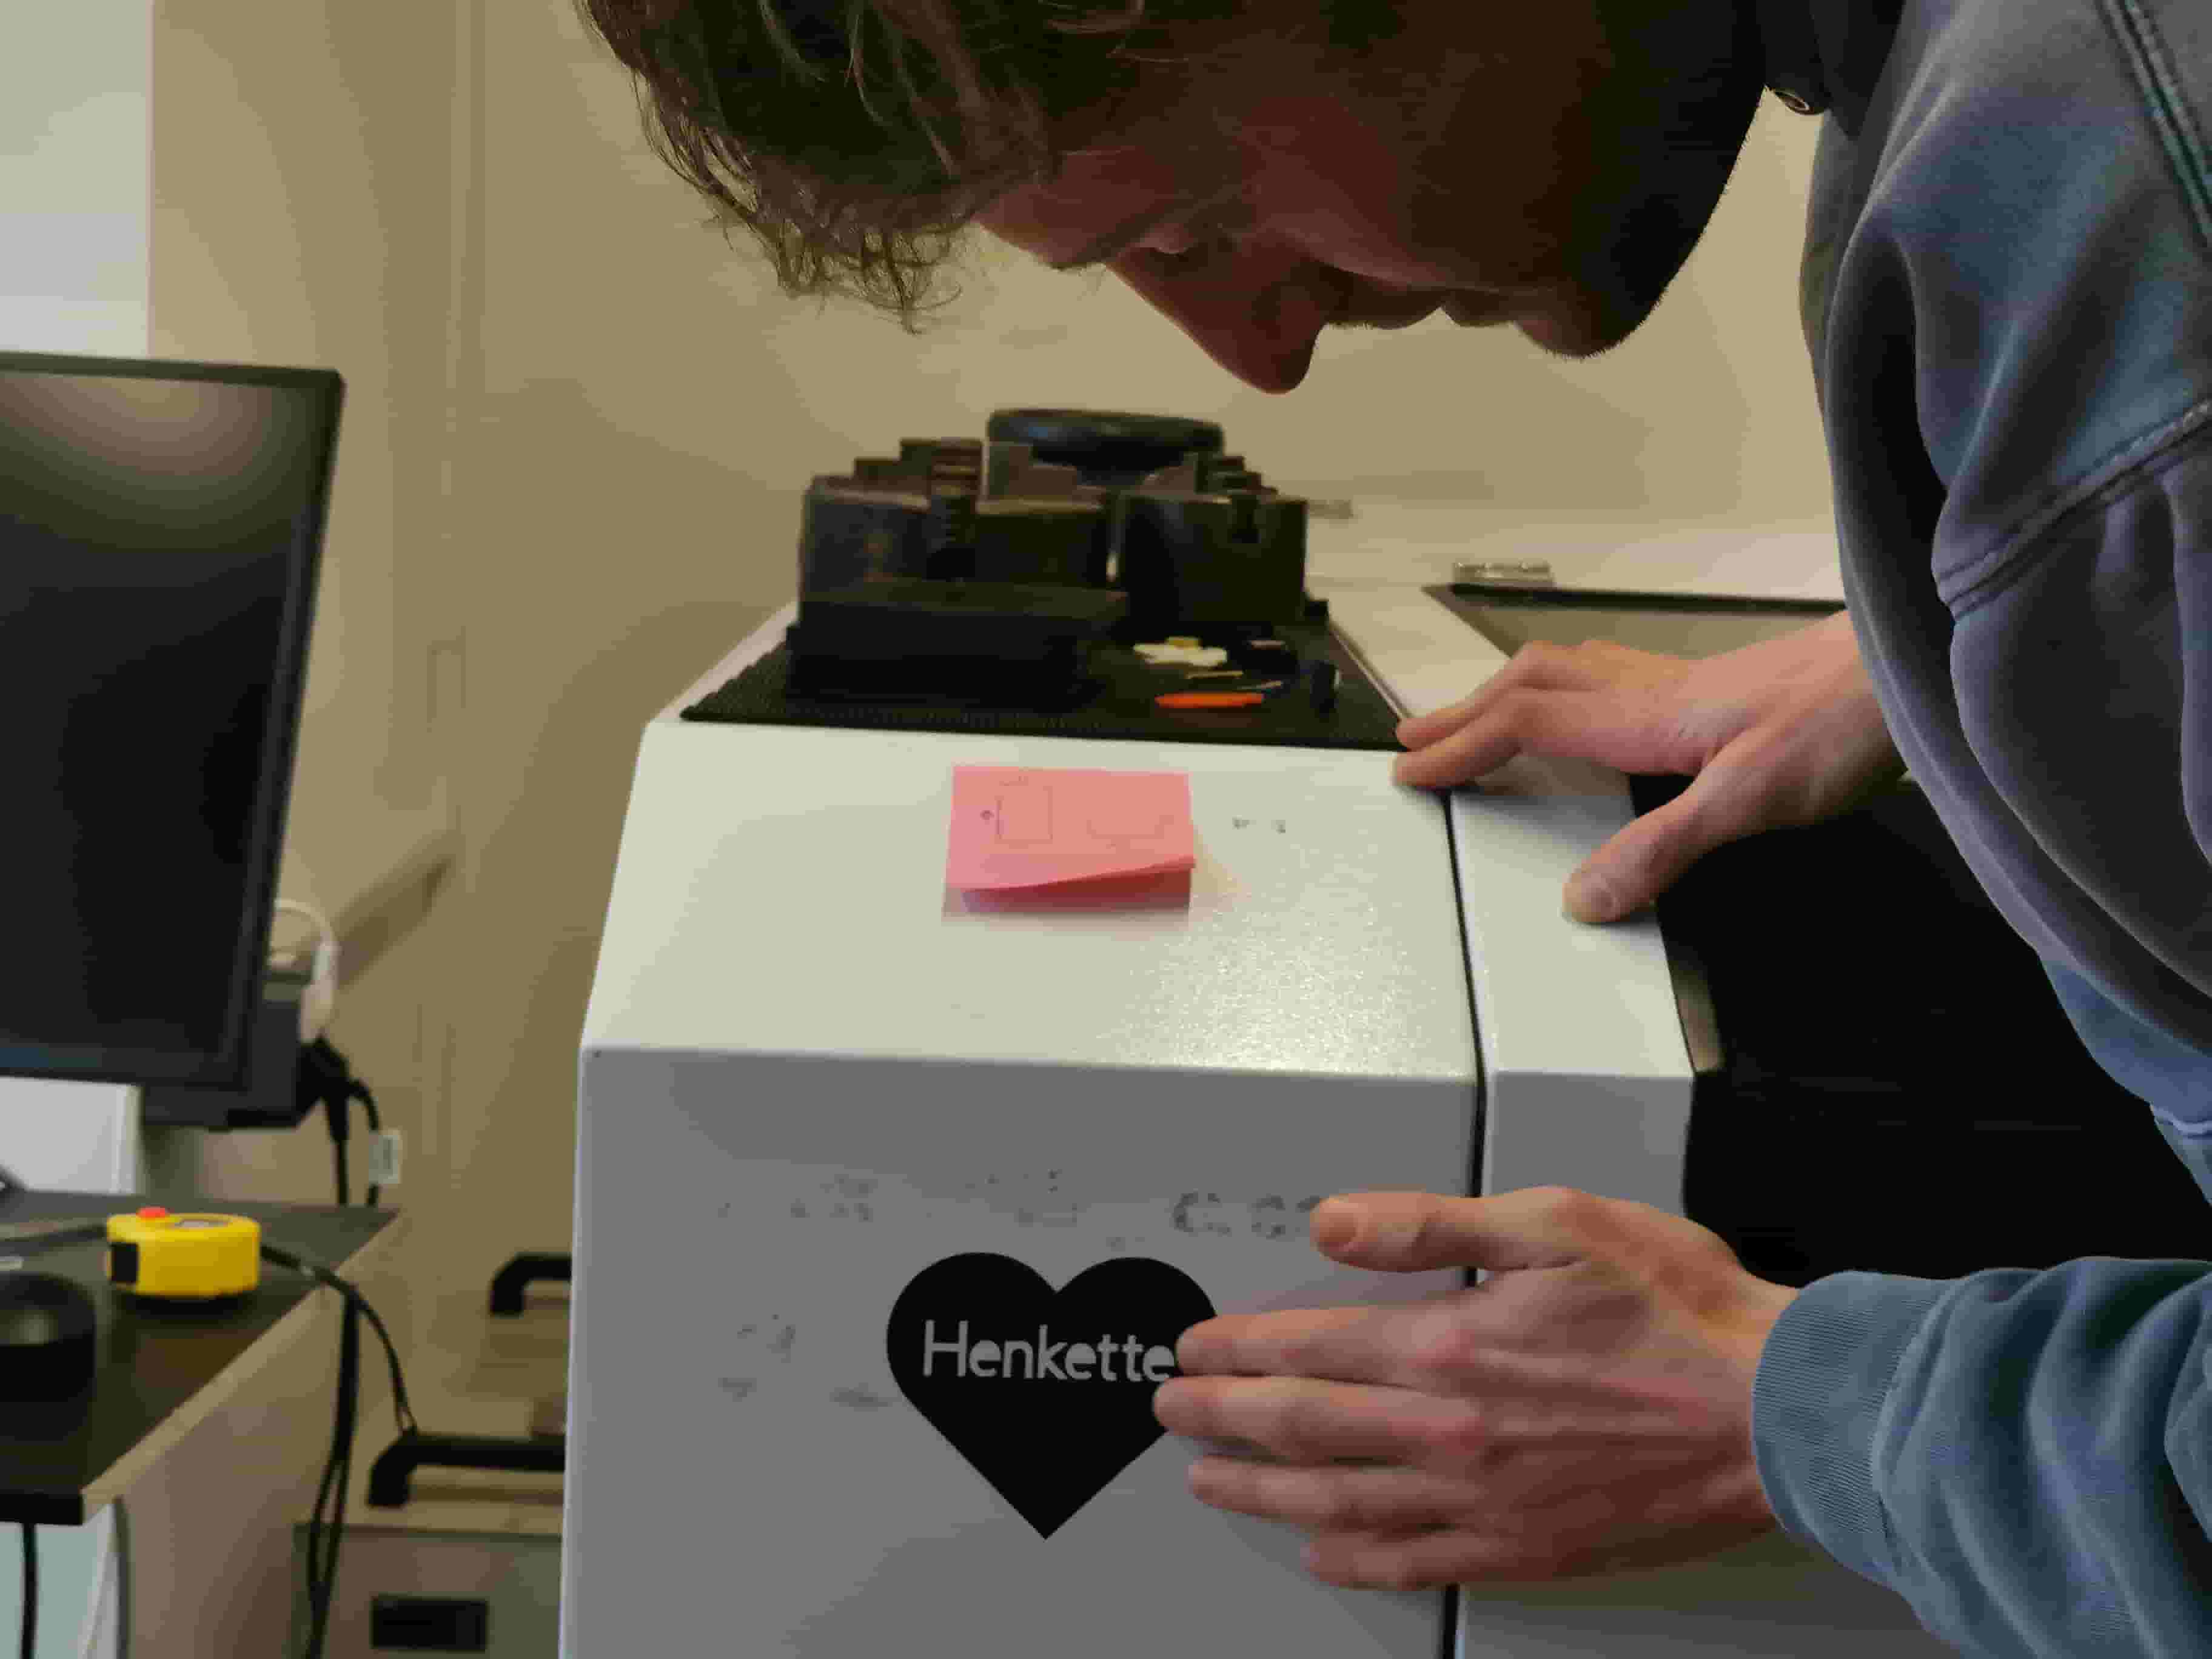
Our Lasercutter: Henkette
Model: BRM90130
Safety rules of Henkette
1: Never leave the red area while cutting
2: Make sure the chiller is on before cutting.
3: Give 1 min to vent before opening for evaporation.
4: Do not use material if you are not sure what it is.
5: If Z-axis of table is to be adjusted ask Henk.
Steps of Henkette
1:  Turn the red knob to on
2:  Flip the auxillary switch on
3:  Reset the machine
4:  Make sure computer is on
5:  Insert memory stick (under the machine)
6:  Flip the switch on the chiller: Make sure its on before cutting.
7:  Place material on honeycomb table (weith diwn if nessecary)
8:  Adjust focal point of laser using the acryllic piece
9:  Import files into Lightburn
10: Reference test pices for settings.
11: Adjust: speed, max power, min power, mode (we mostly use line), and pass count
12: Cut -- DO NOT LEAVE RED AREA
Calculating kerf
Before cutting a material you need to calculate the kerf. The Kerf is the amount of material that gets removed by the laser. To find this value a kerf-test is needed.
To do this we cut out a 10 cm scuare with 9 cuts in it. Resulting in 10 pieces.
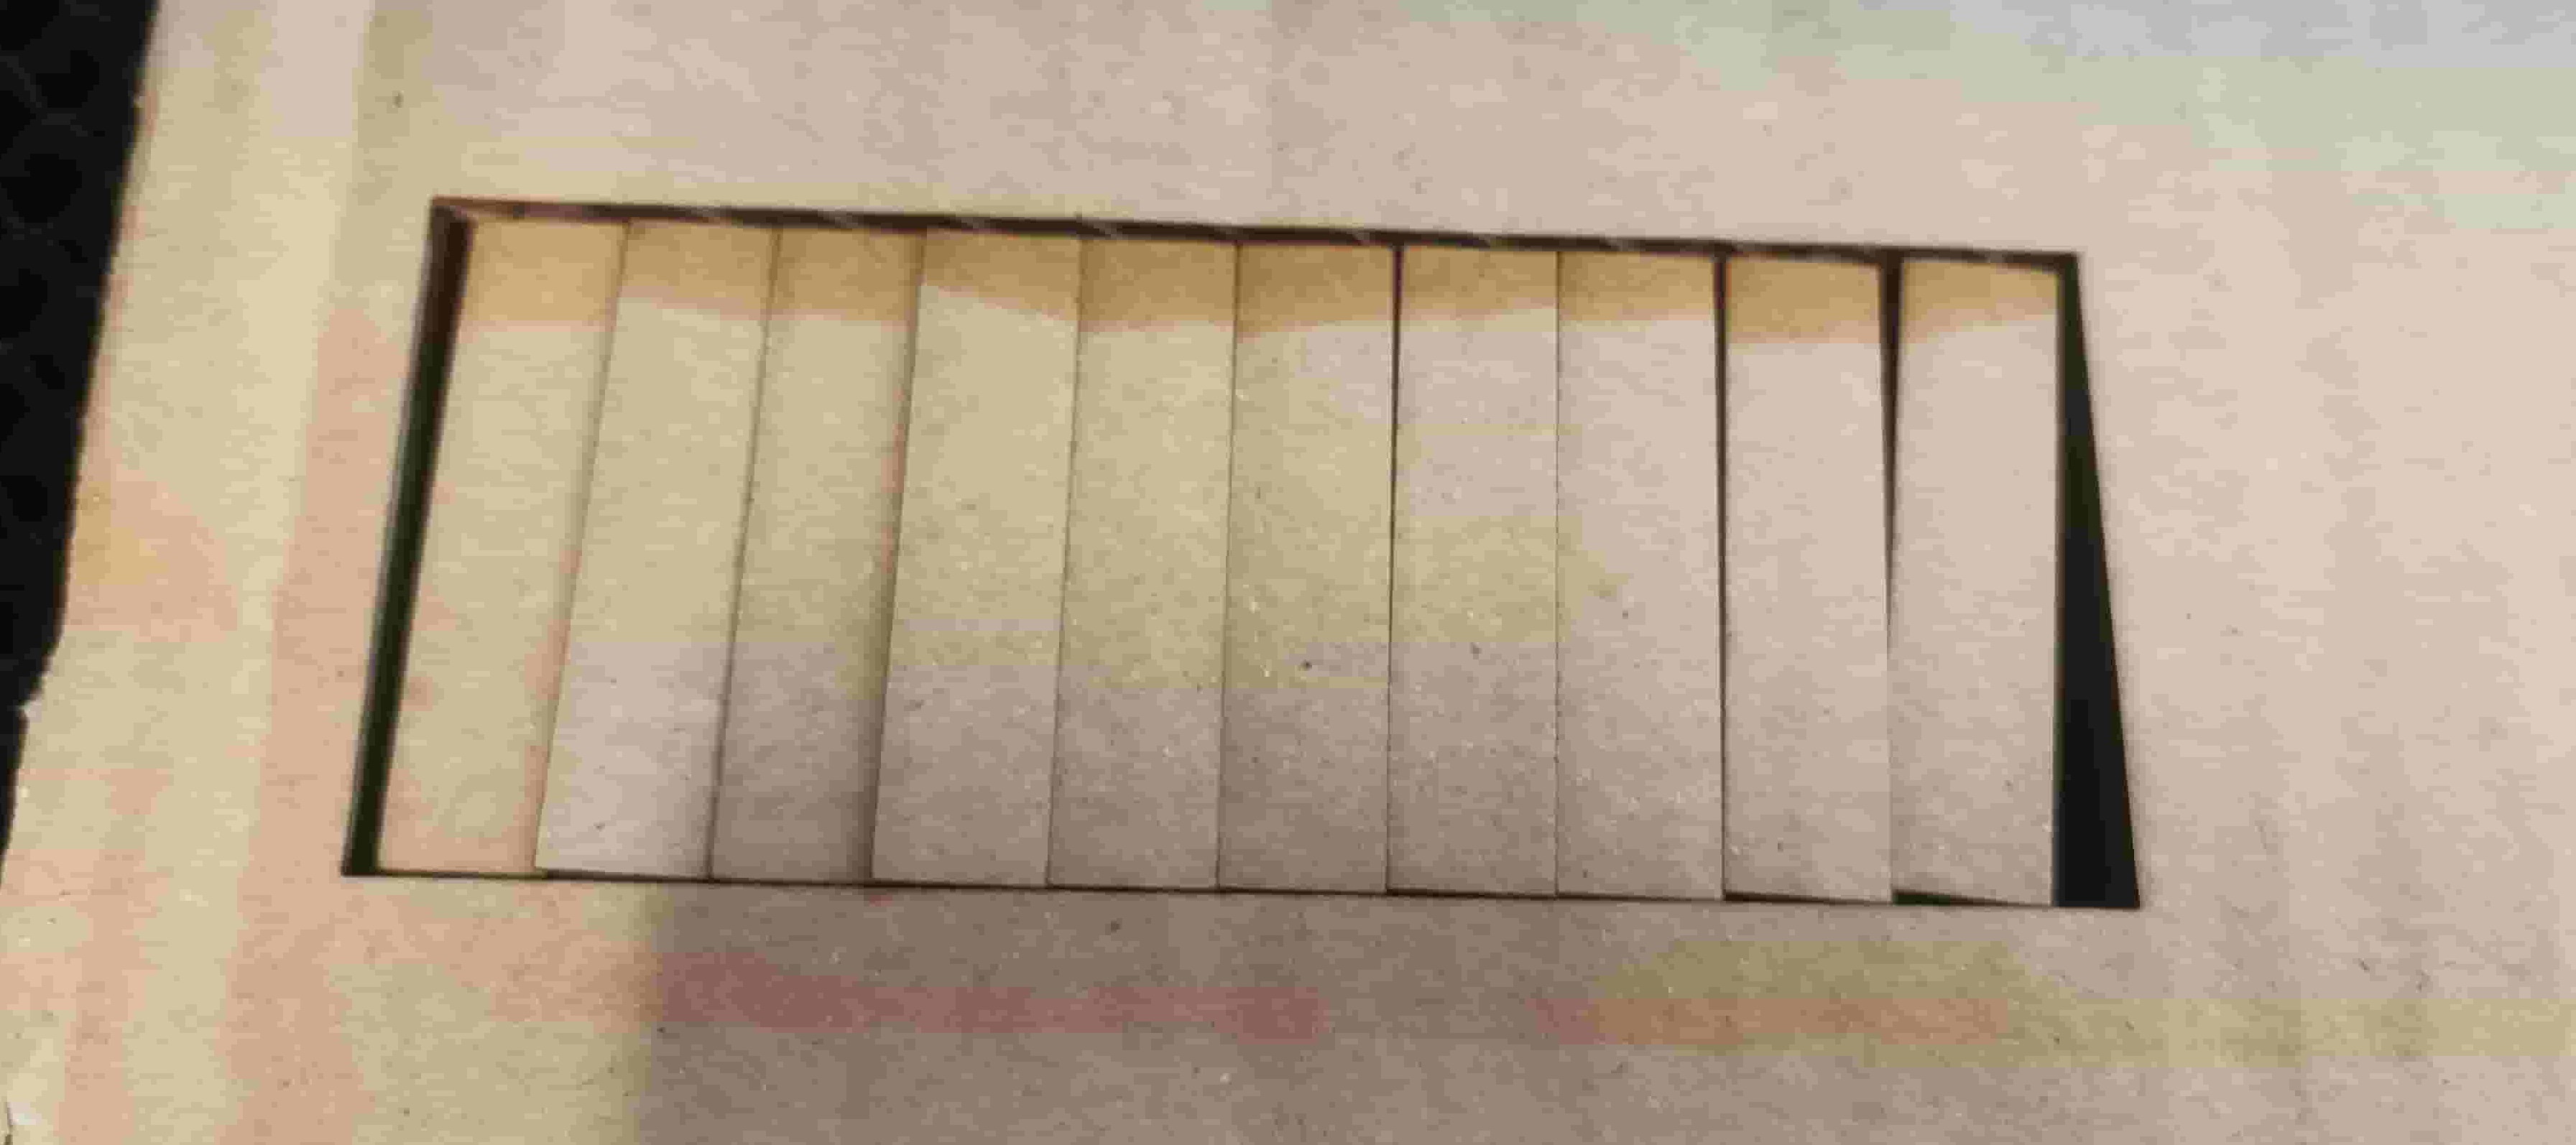
If cutting cardboard it's good to make sure to place the cardboard so that the lines of the inner material lays horisontally. If the paper is in the other orientation the next part of the test becomes difficult because the pieces will slide under each other.
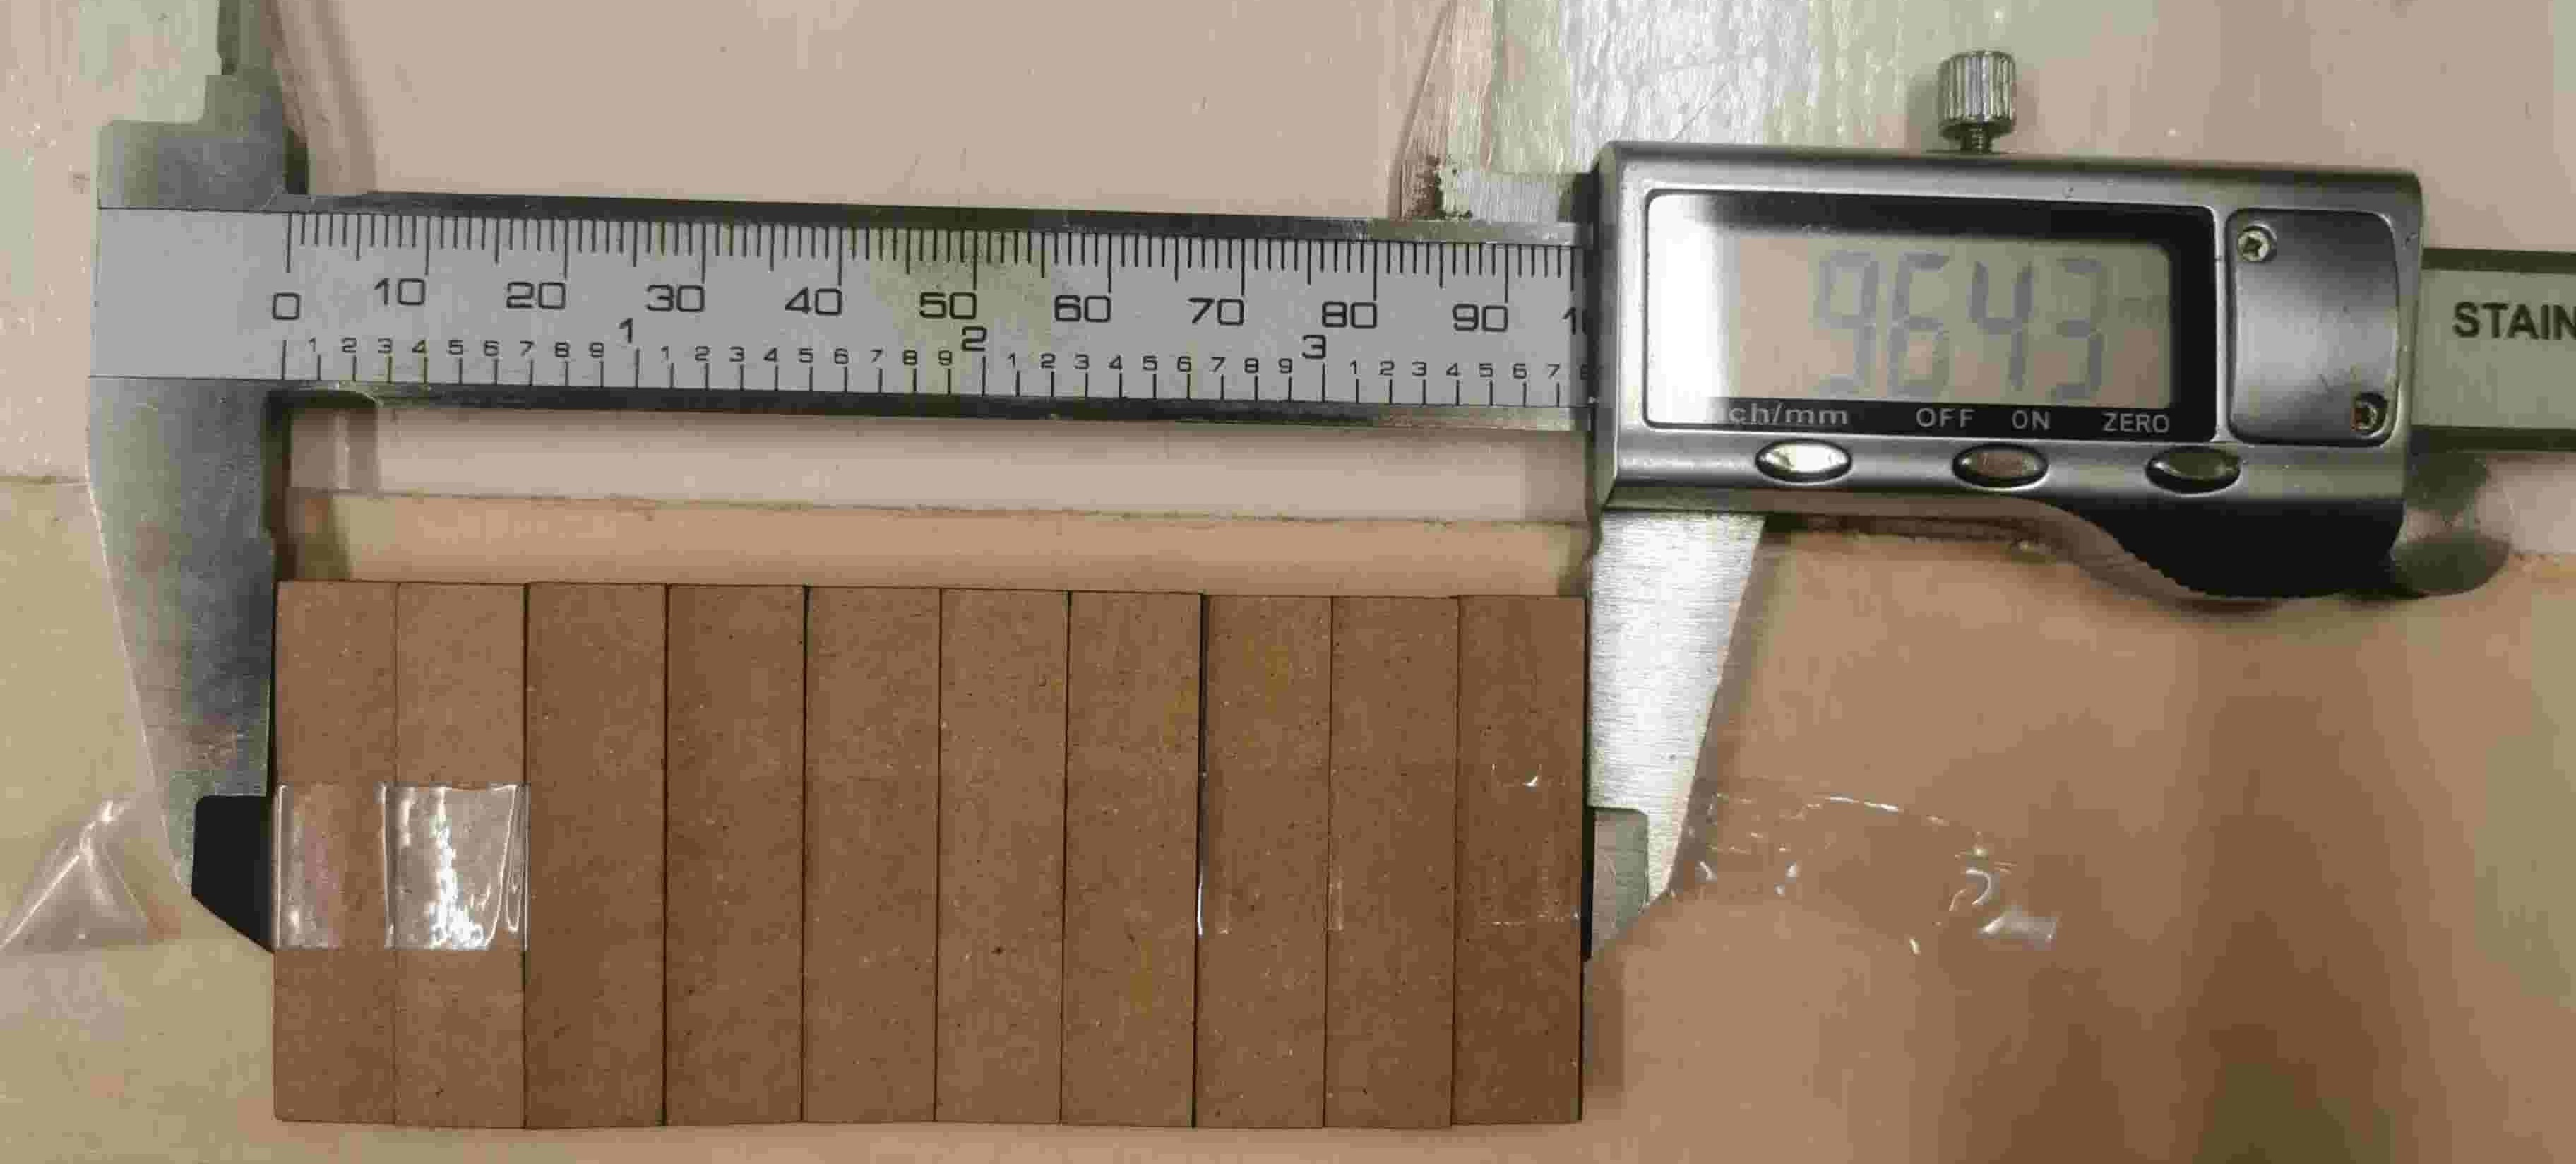
Now using a caliper we can measure the total width of the pieces and calculate how much material was removed. There was 11 cuts made, but since 2 of those cuts were edges they only count for half a cut each. We therefore devide the total by 10.
Kerf calculation:
Measurement: 96.43mm
After cutting: 100 - 96.43 = 3.57mm

3.57 mm/10 = 0.357mm kerf

In CAD softwares you offset by the radius of the kerf
0.357mm/2 = 0.1785mm
Plant stand
This weeks assignment is to design, lasercut, and document a parametric pressfit construction kit while accounting for the lasercutter kerf, and to vinylcut something.
I will be making a modular shelf unit for a small window in my apartment. It is the only window in my apartment where there is enough sun to grow seeds in spring for the garden, and also the only window my cats cannot reach. I therefore want a shelf that can take up the whole window or a smaller section if needed. In addition to this it would be nice if the "floors" of the shelf can be removed if some plants grow too high.
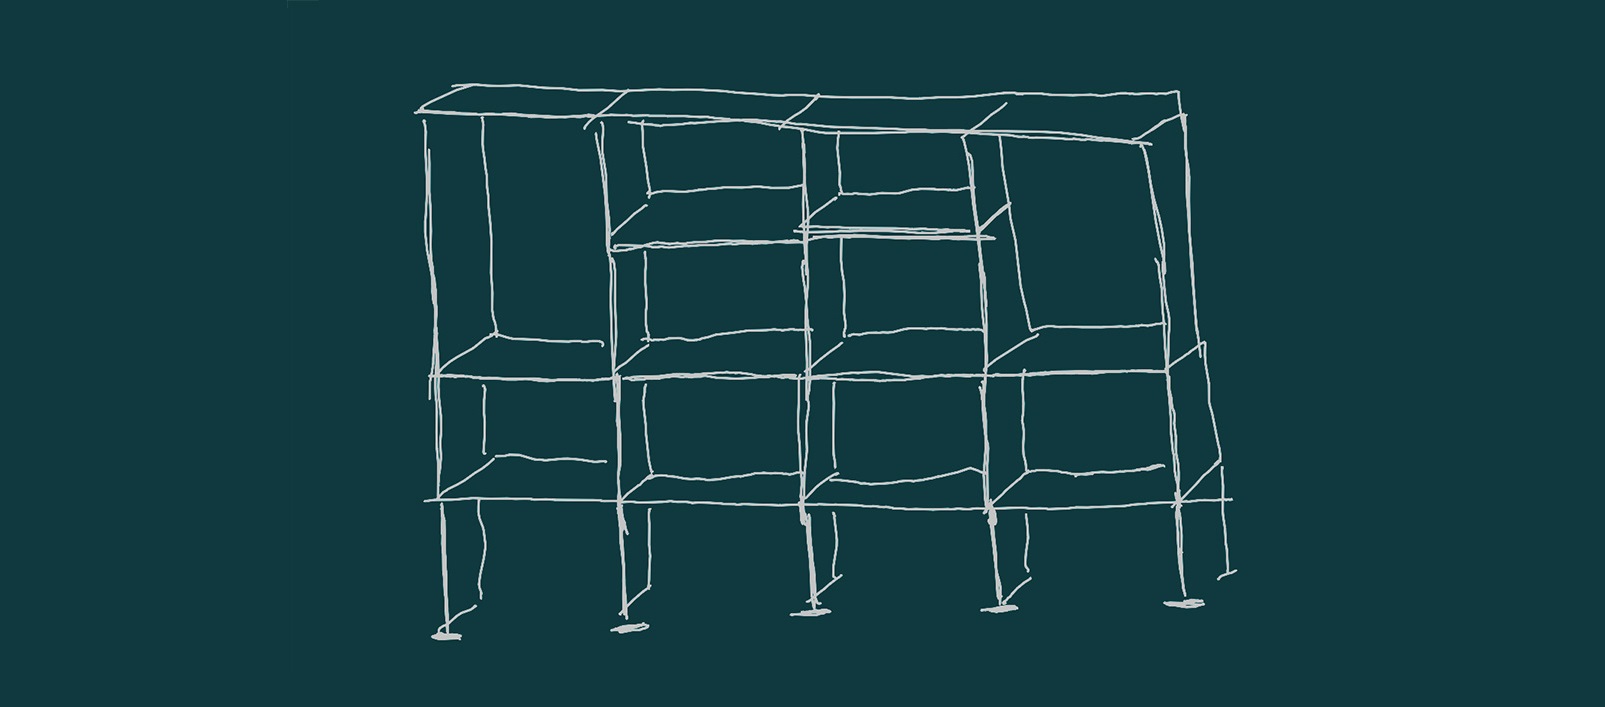
Before starting to model I made some sketches of the different pieces I would need and imagined how it would join together.
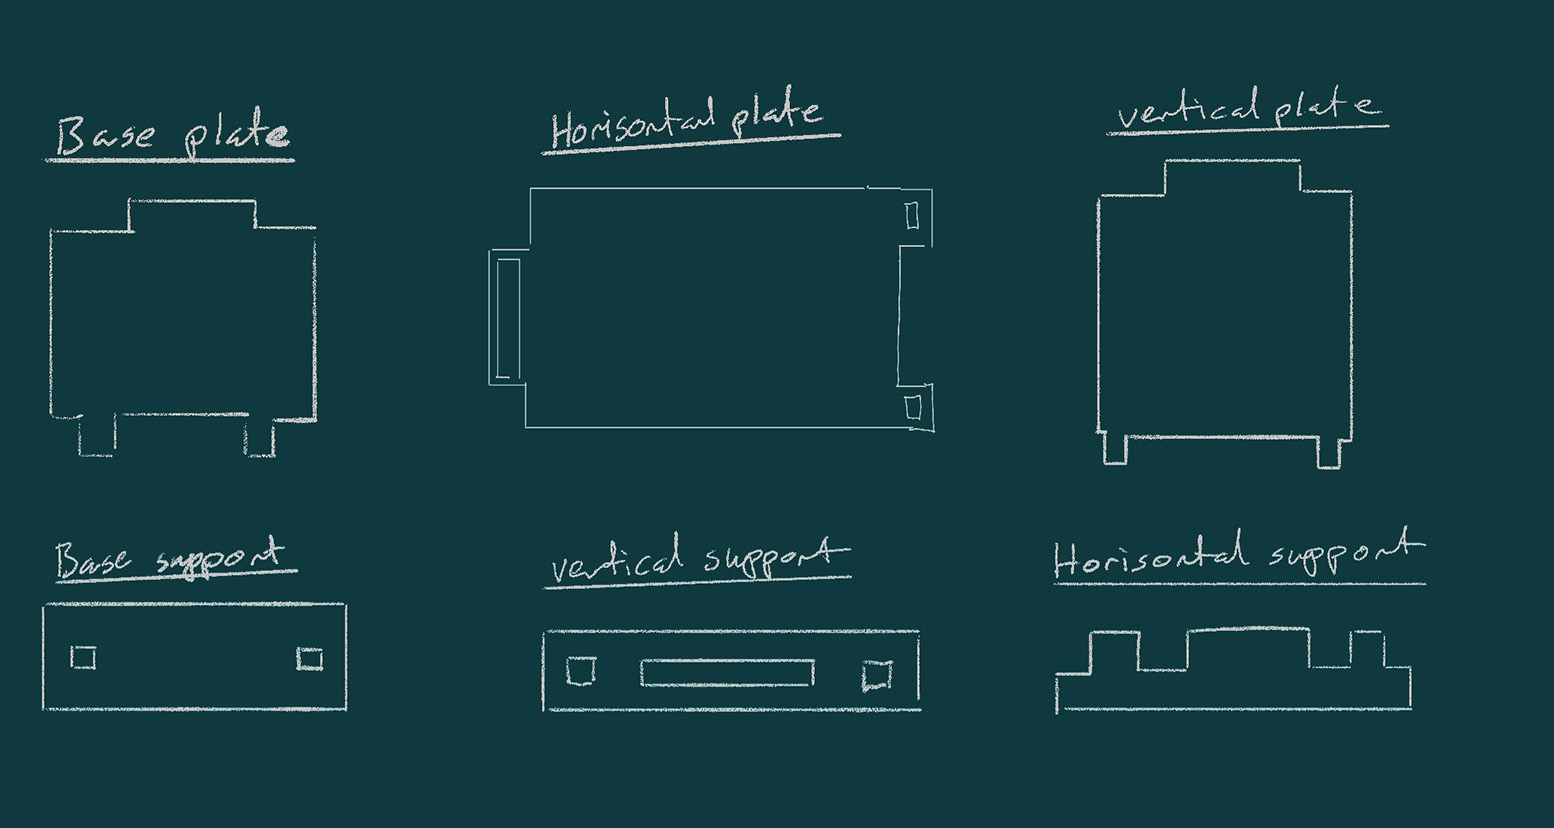
Base plate: lift the unit up past the part of the windowframe where little or no light will come in.
Base support: To give more stability and surface areal.
Horisontal plate: The shelves
Vertical plate: The walls
vertical support: Support between walls
Horisontal support: Support for top of unit and in
Parametric model
To prepare the files for the parts needed for this project I used Fusion 360. The parts needed to be created parametricly, meaning that when one value is changed all the parts will adjust along with it. It was a bit of a hassle to set up, but once it is set up correctly it has made making adjustments very simple!
I started by declaring prameters in Fusion:
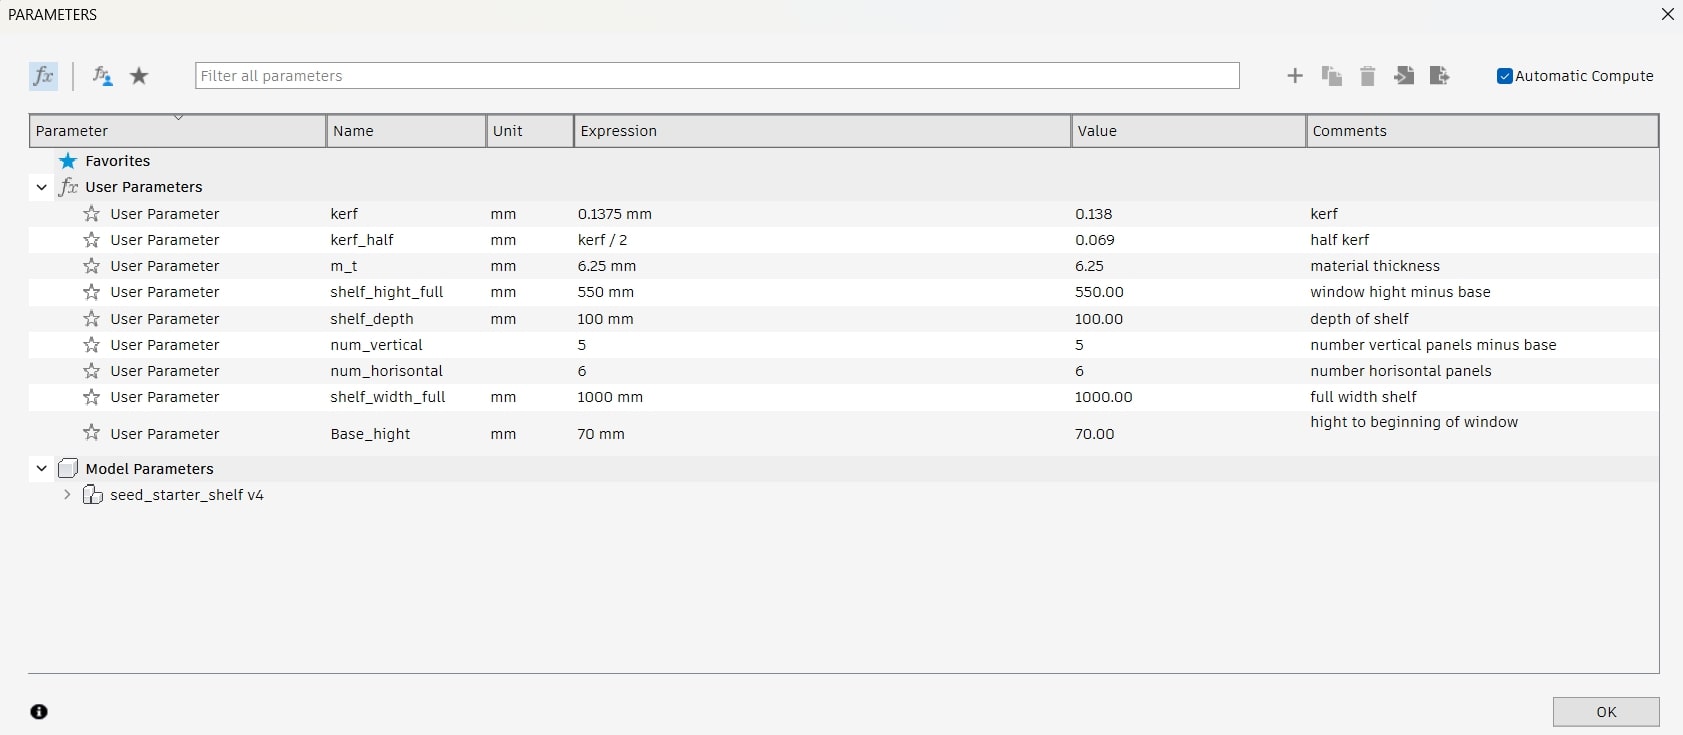
My goal was to be able to declare the size of the window and how many sections horisontally and vertically I wanted in the parameters as well as the hight of the base layer (for the most amout of sunlight) and have the design make itself based on those values.
The parameters were used to constrain all parts of the designs. Here is an example of this:
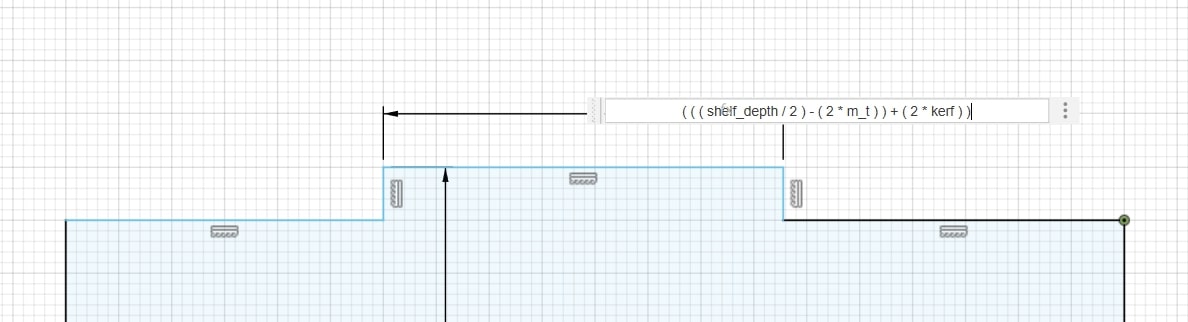
If the lines are blue it means the shape is not fully constrained.

In order to check if the sketch is in fact constrained you need to lock a point on the chape. You can do this by clicking this icon:

If all the lines turn black then all the lines in the sketch is constrained. If not then you need to start going through the measurements and constraints and redefine them or adjust and see where the problem was.

I had to adjust quite a bit, and in 1 case I ended up rebuilding the shape andfter getting confused about all the different paramenters and which went where.
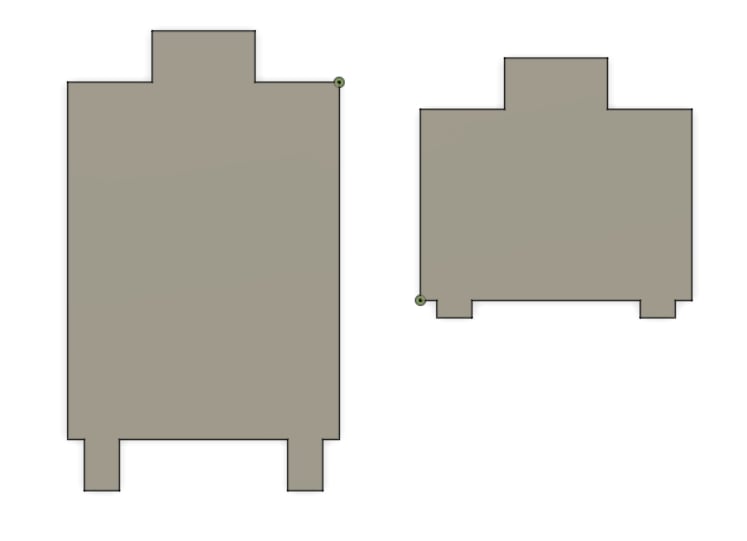
Here are the pieced designed for my first test cutting:
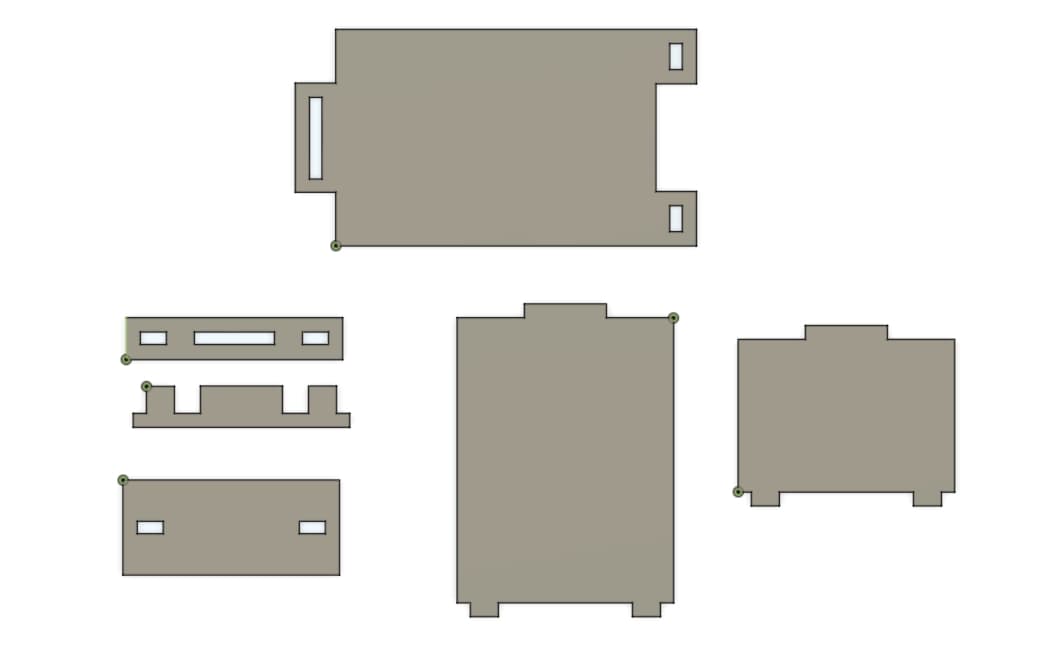
I only cut 1 of each of the parts and tested if they fit good together. And for the joints they did!
I was very excited! So excited in fact that I did not think to check how multiple layers would attatch to each other.
They did not.

I only realised this after printing a bunch more pieces.
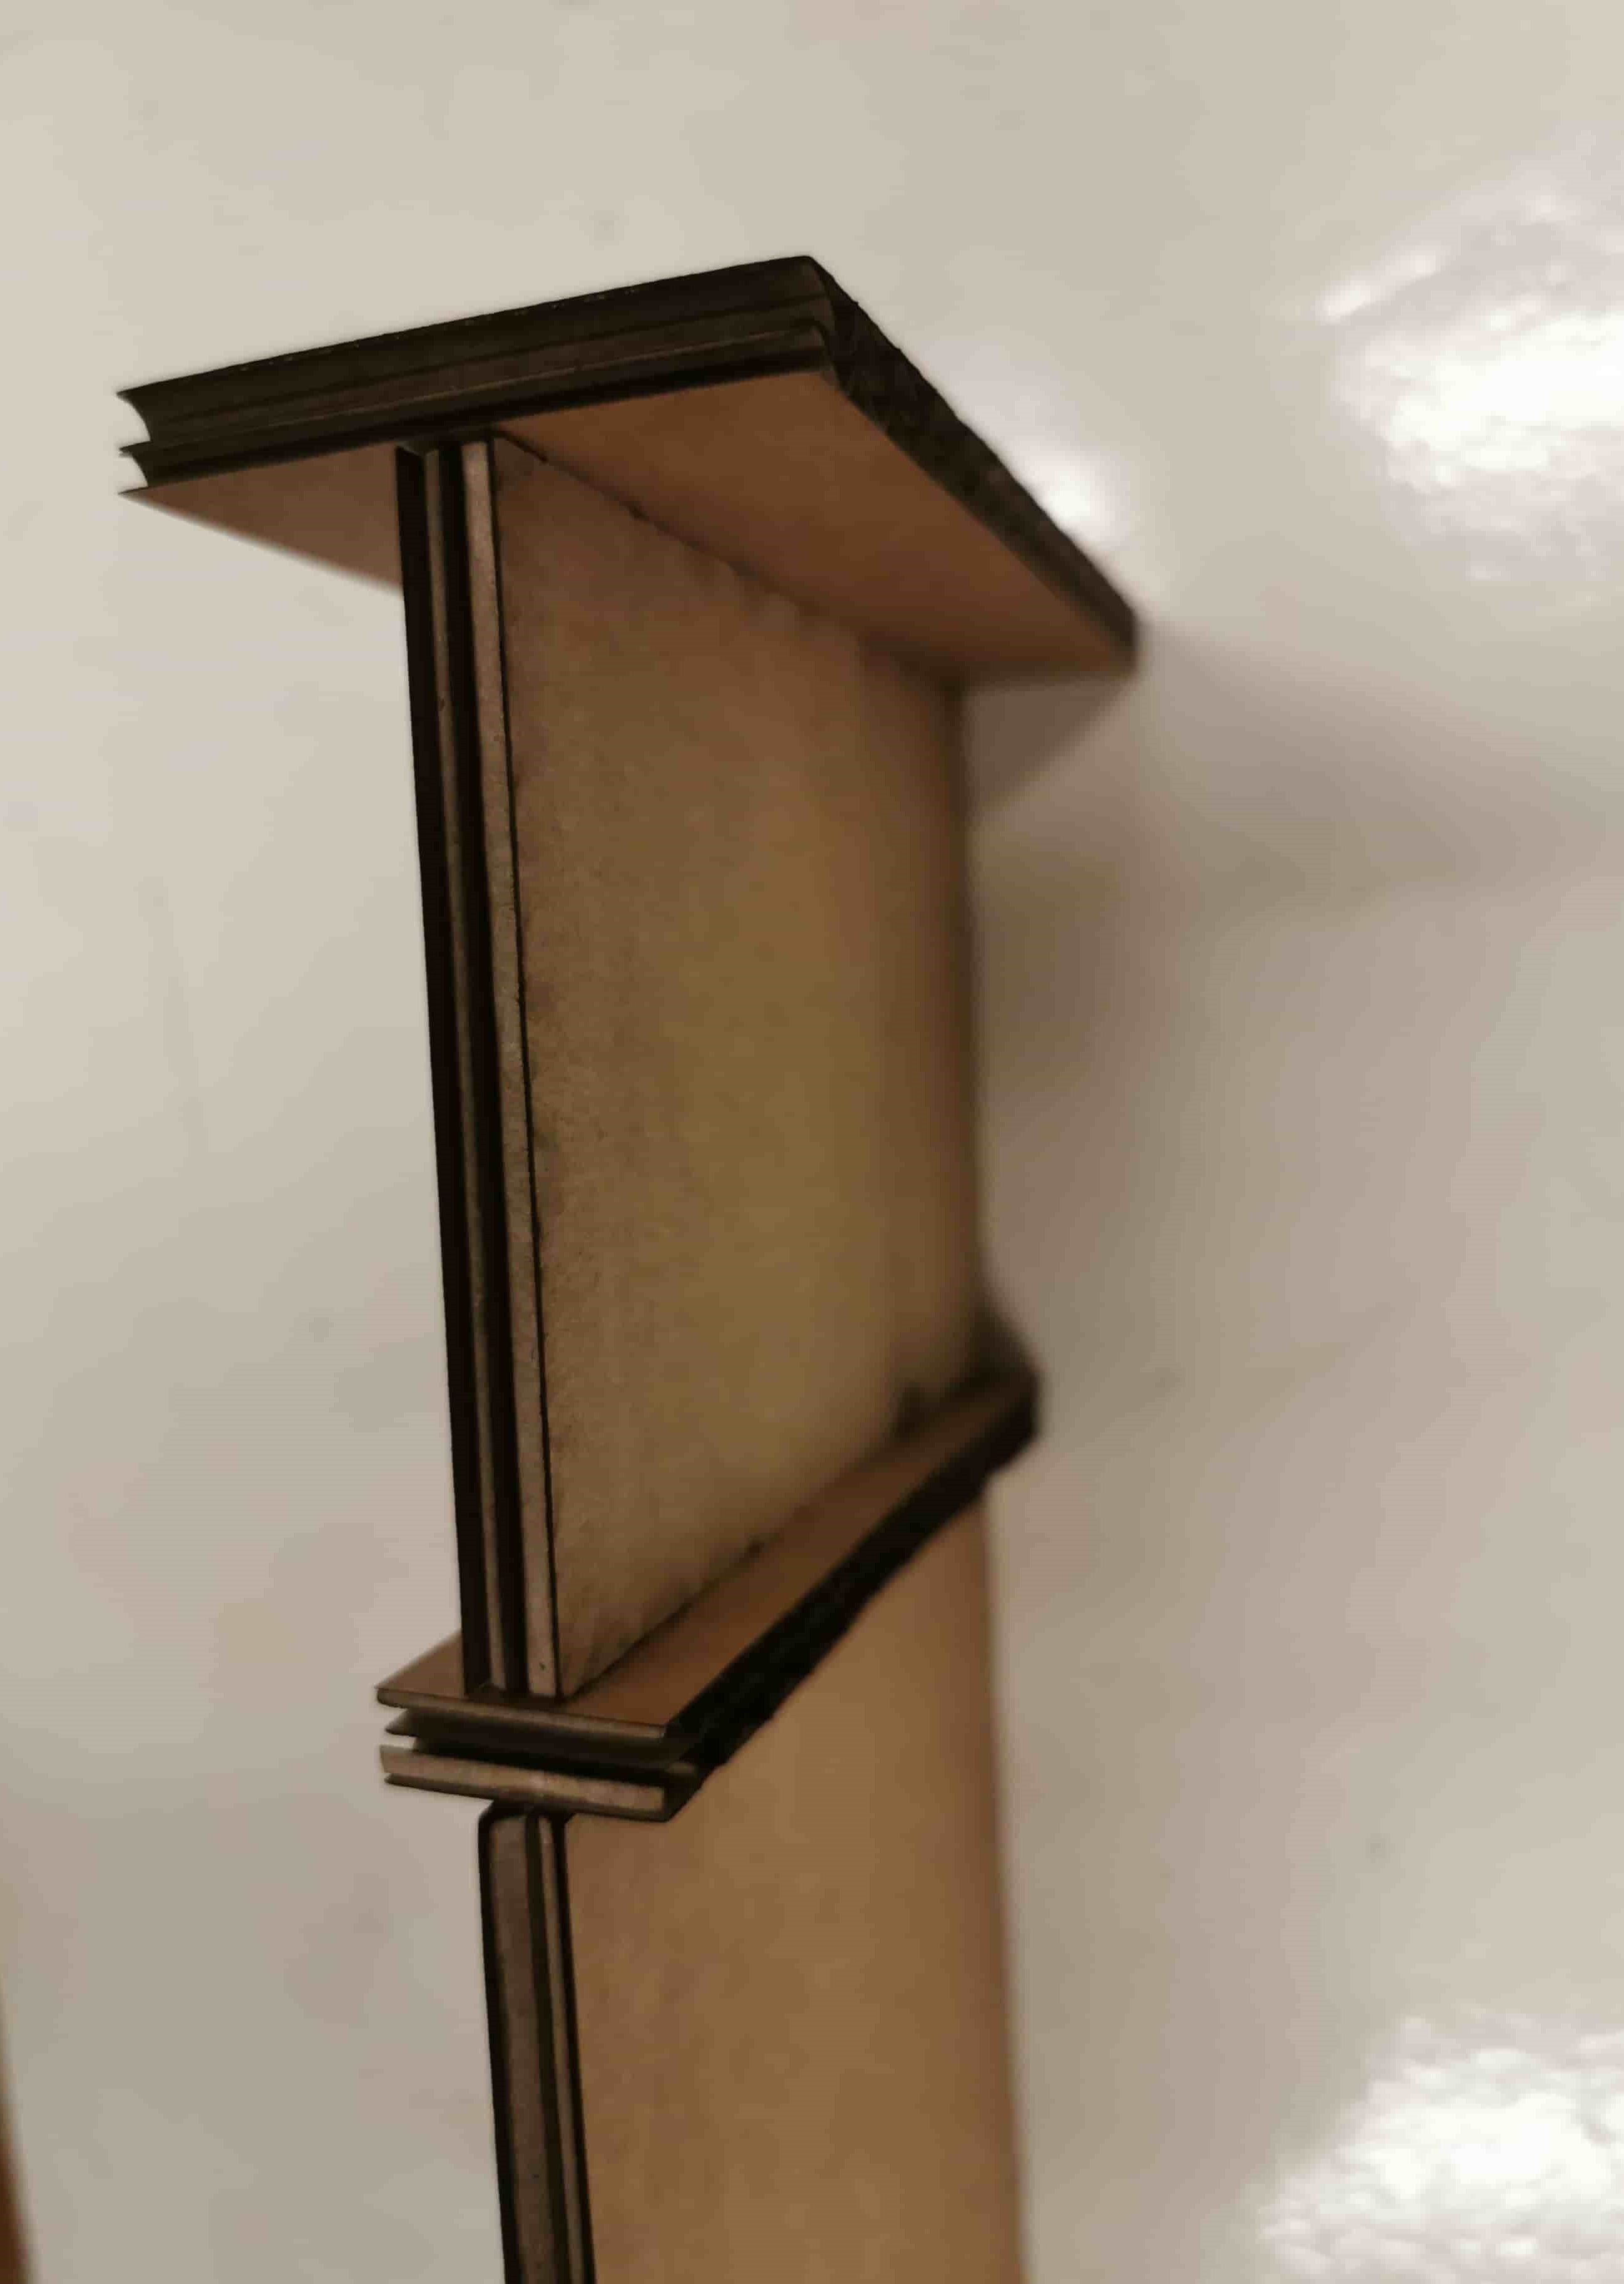
After some thought it came to me that by extening the connection points of the vertical panels I could snadwitch the horisontal panels between 2 vertical supports and hopefully make the shelving unit 1 complete piece and sturdy enough.
I adjusted the parts and made the connection points of the vertical panel and the top connection point of the base panel 3x longer.
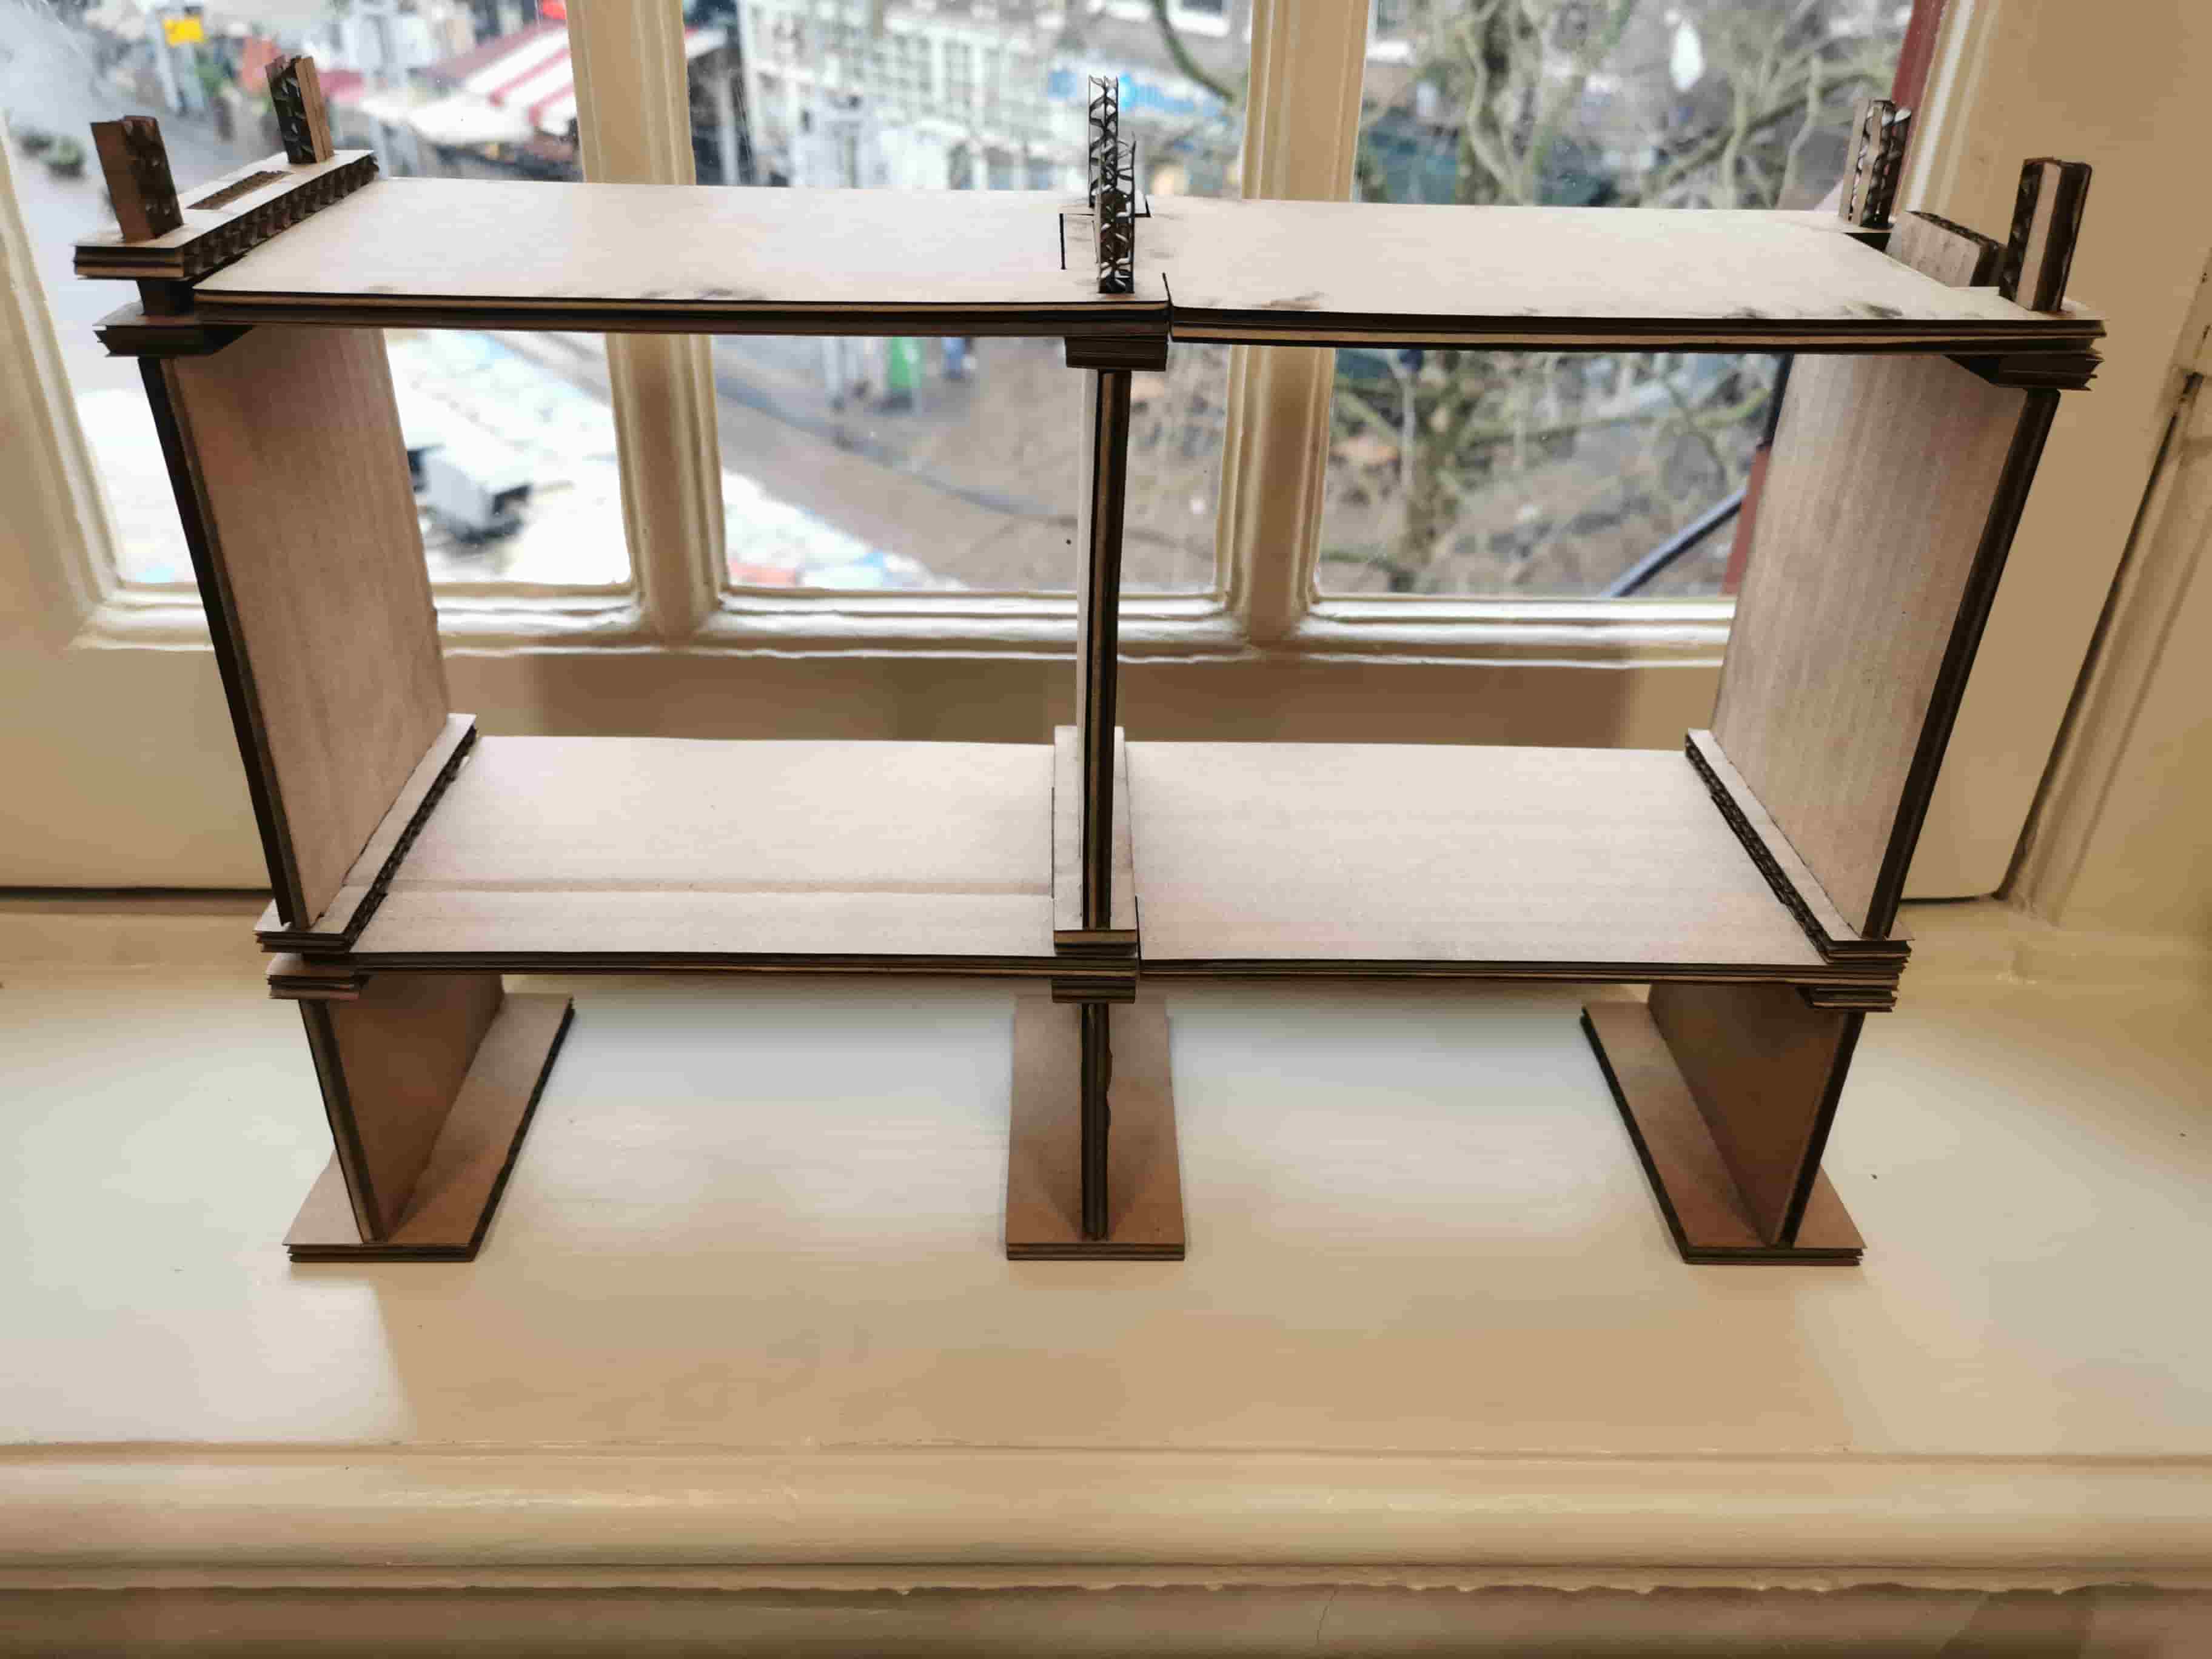
Here is the finished prototype!
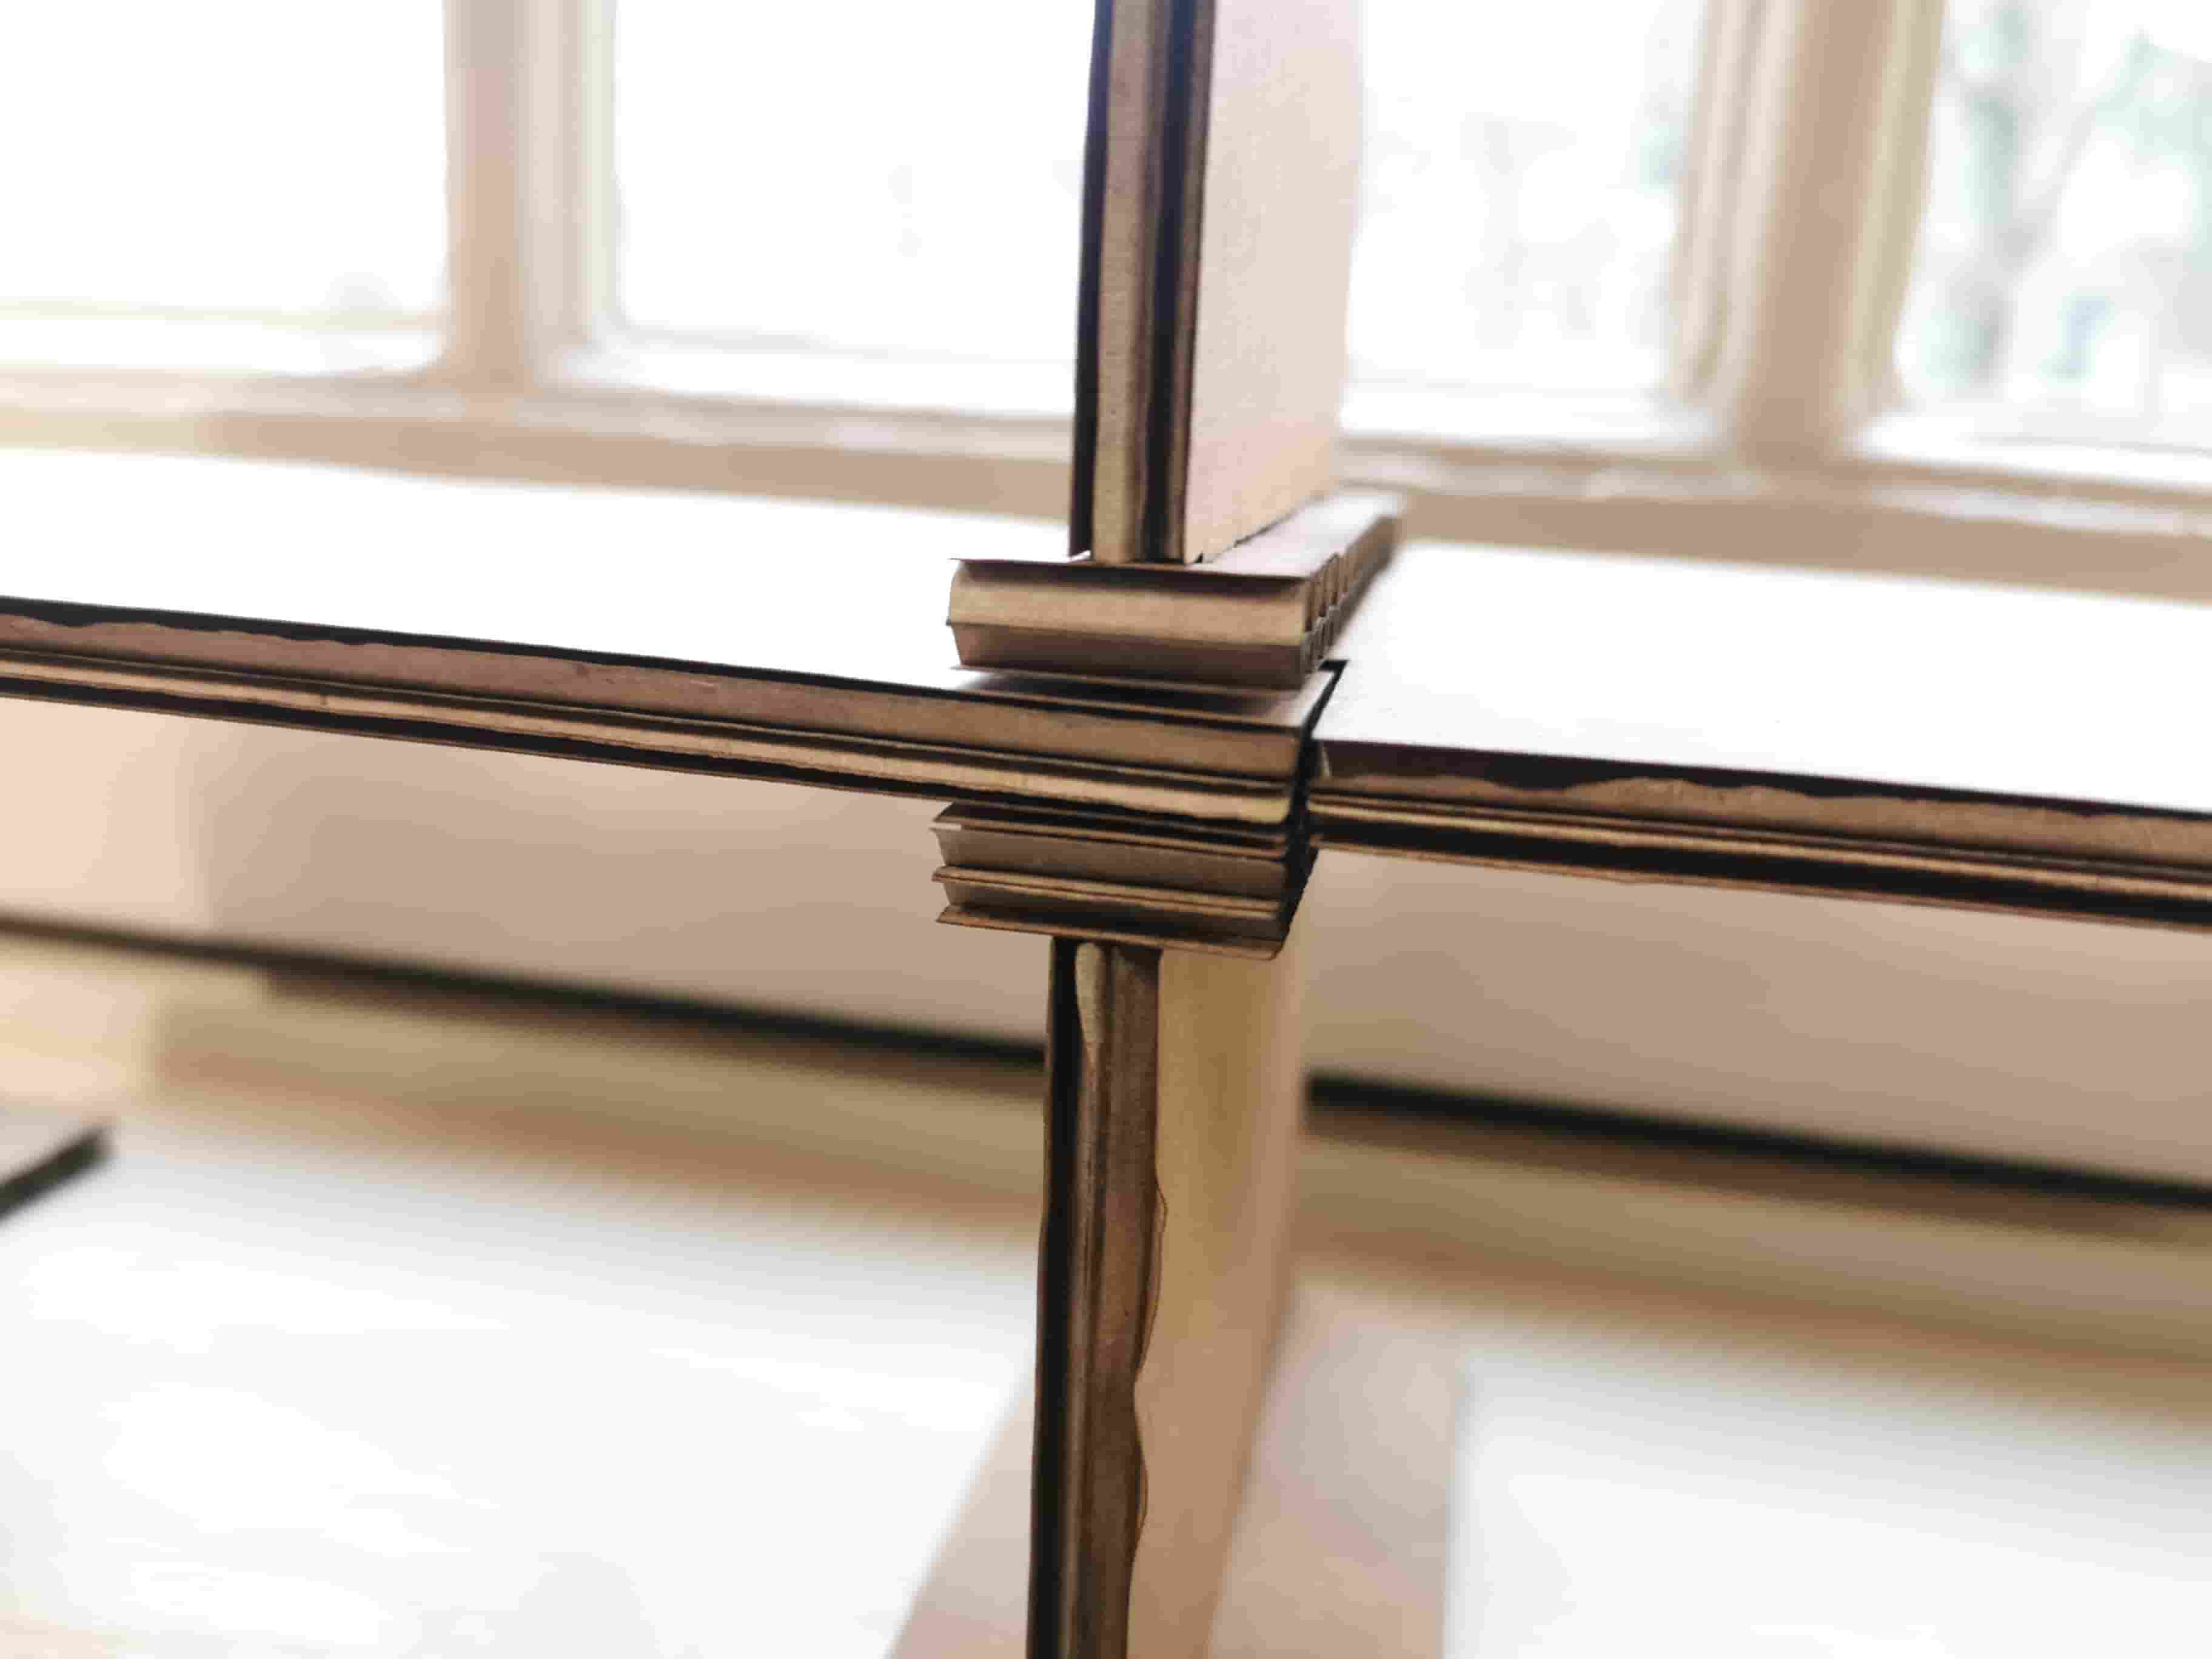
And a close up of the new sturdy joints.
I hope to be able to cut a final verion in acryllic.
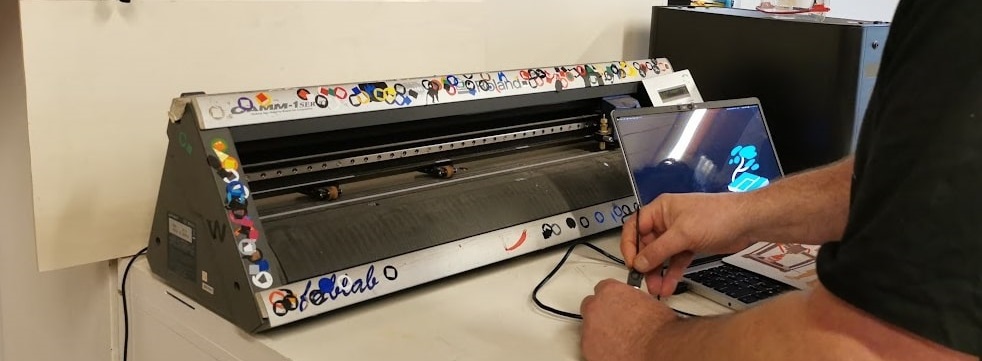
Vinyl cutter 1: Roland GX-24
The Roland GX-24 was the vinyl cutter installed here when the FabLab first opened. And It still works! Allegedy! It did not work when Henk showed us how to use it, but I will still write how it should work for future referance.
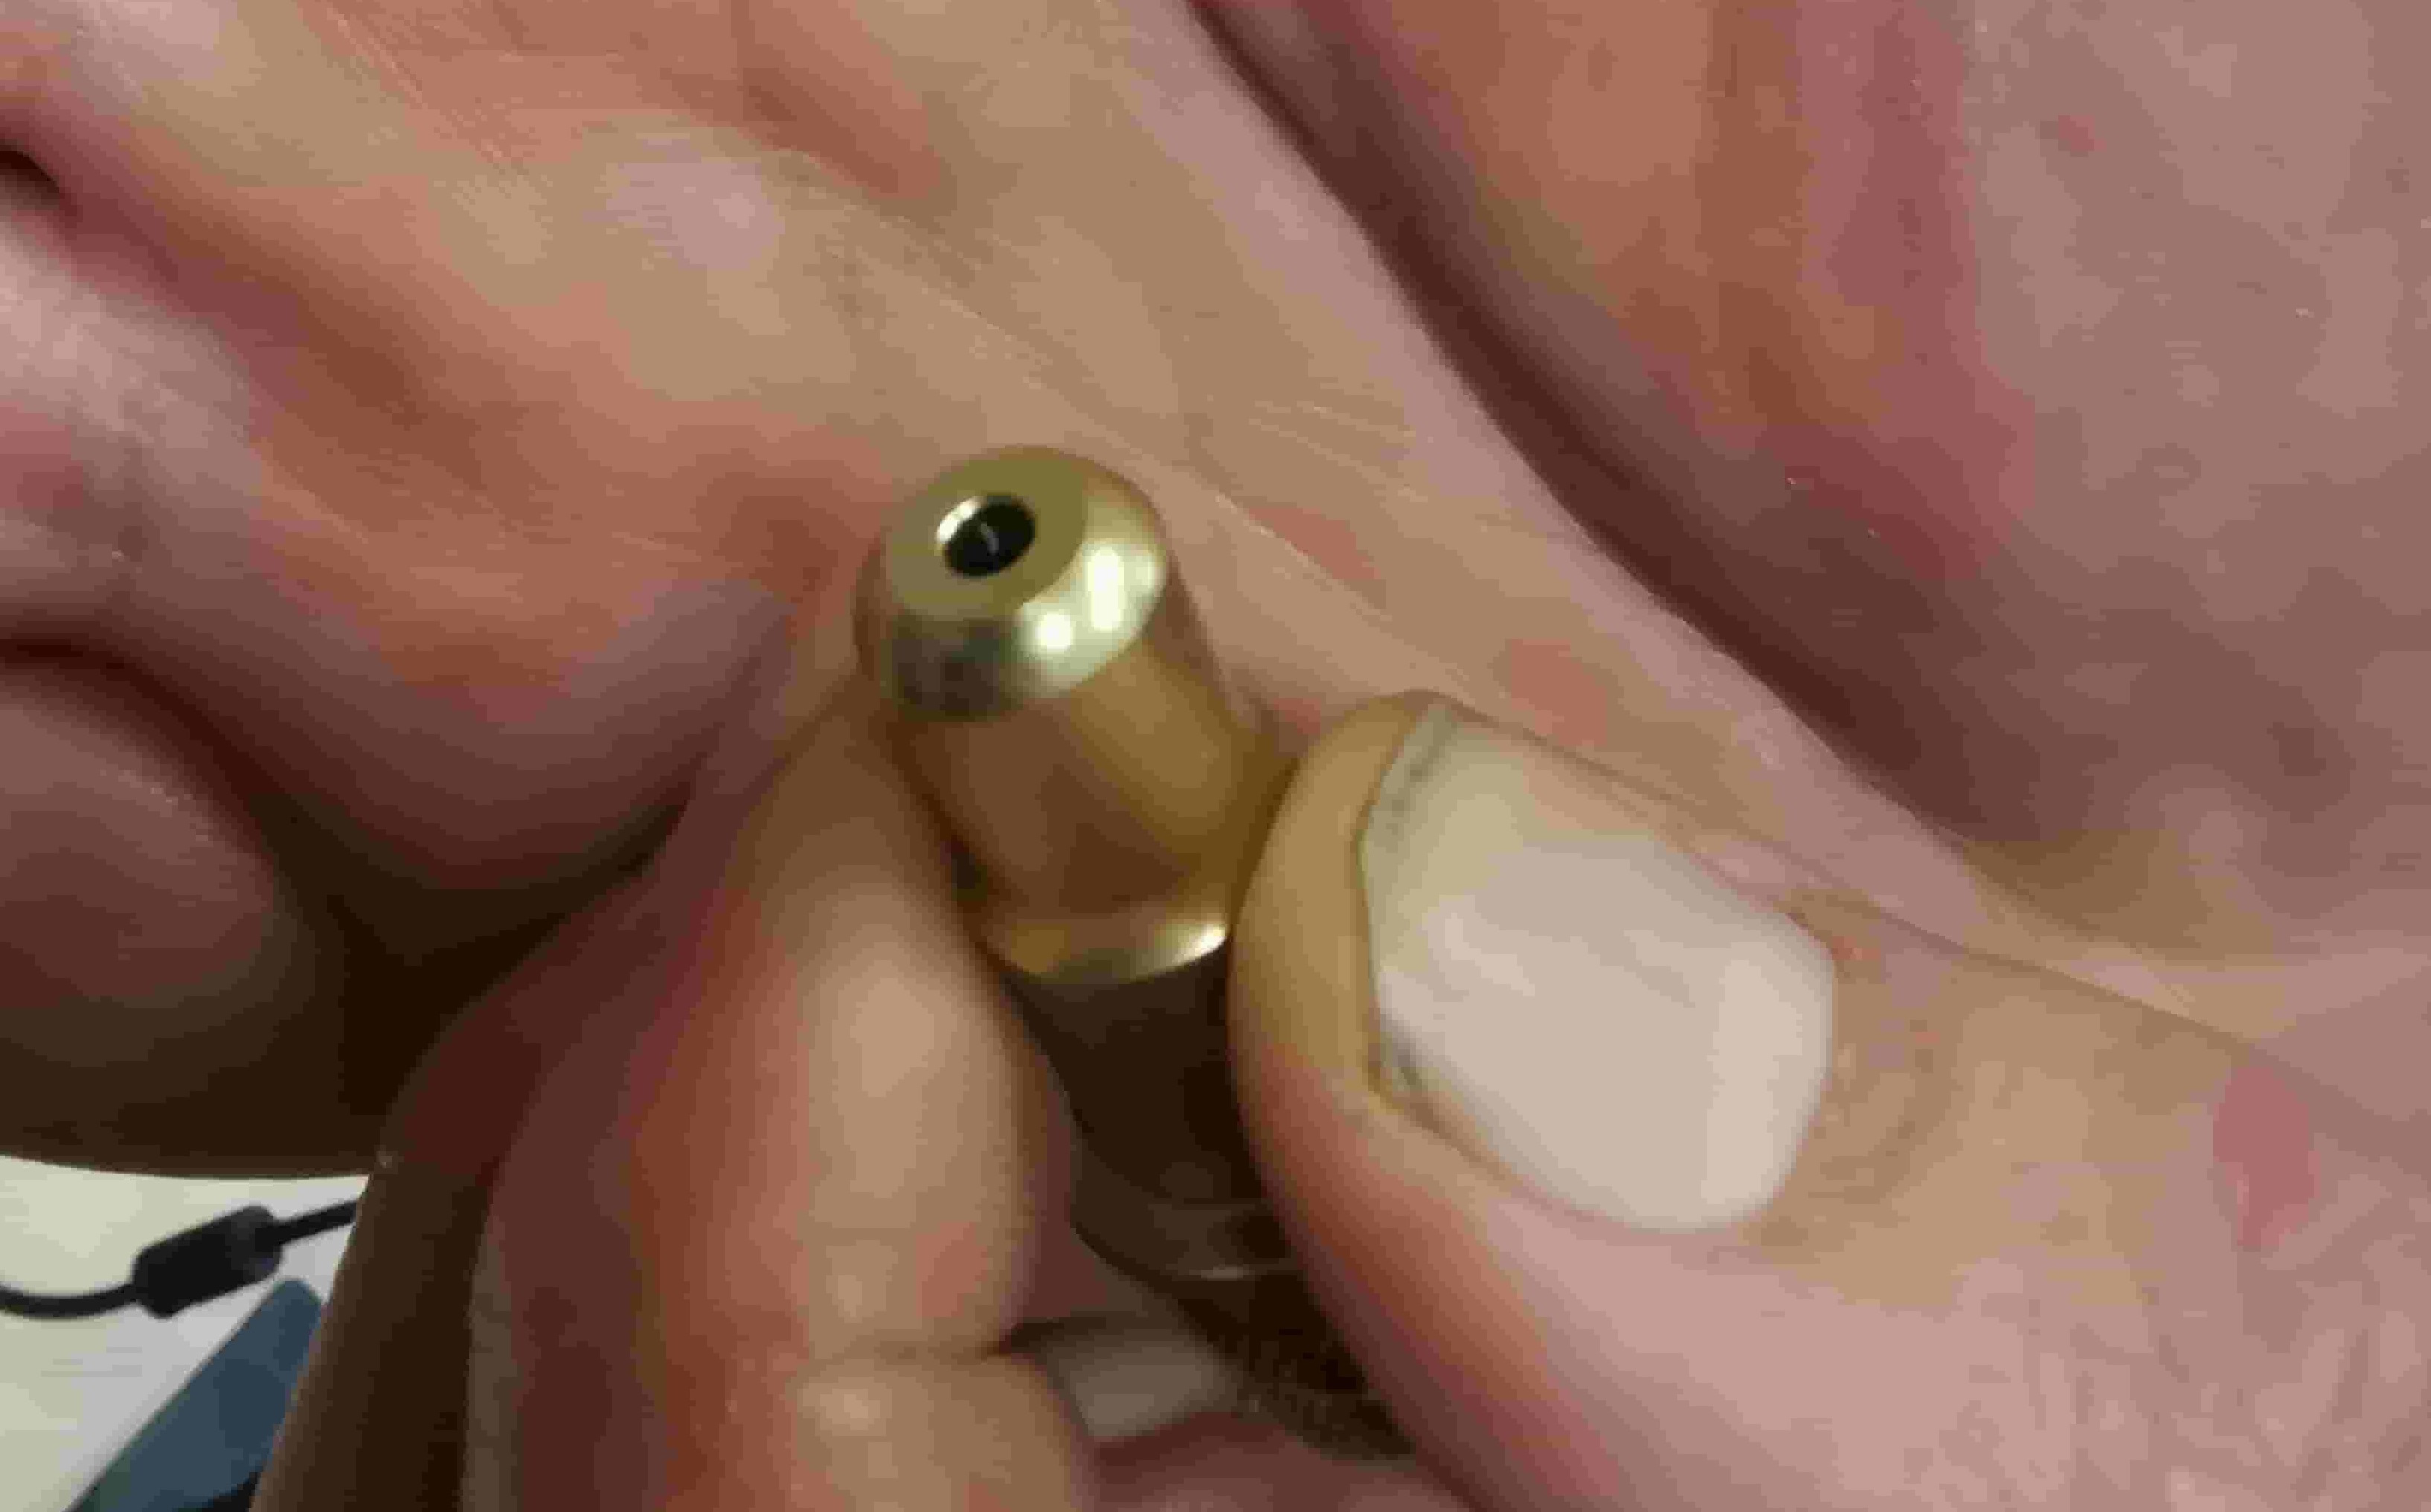
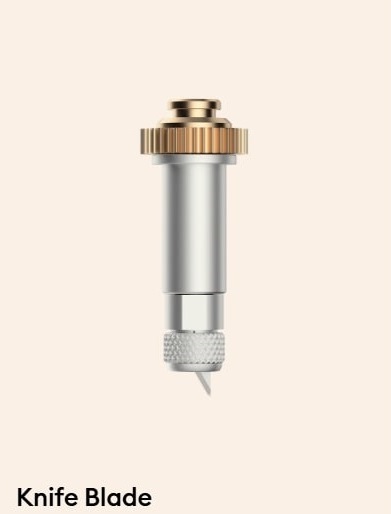
The blade that is used to cut should poke just outside of the hodlder:
There was an open source software developed, that we will also use when milling PCB boards and parts on the CNC amchine, called Mods. Mods runs in the browser so there is no need to download and install extra programs, or to create a user, so that is a plus. It also connects your computer and the vinylcutter through a virtual USB. NB: This can only be achieved using the browser Chrome. It can look a bit confusing to begin with. Luckily for us the Roland GX-24 already has a program installed.
When opening the webpage: right click in the top left corner, click programs, open program, scroll down to Roland GX-GS 24 vinyl cutters and click cut. The program will open and look like this:
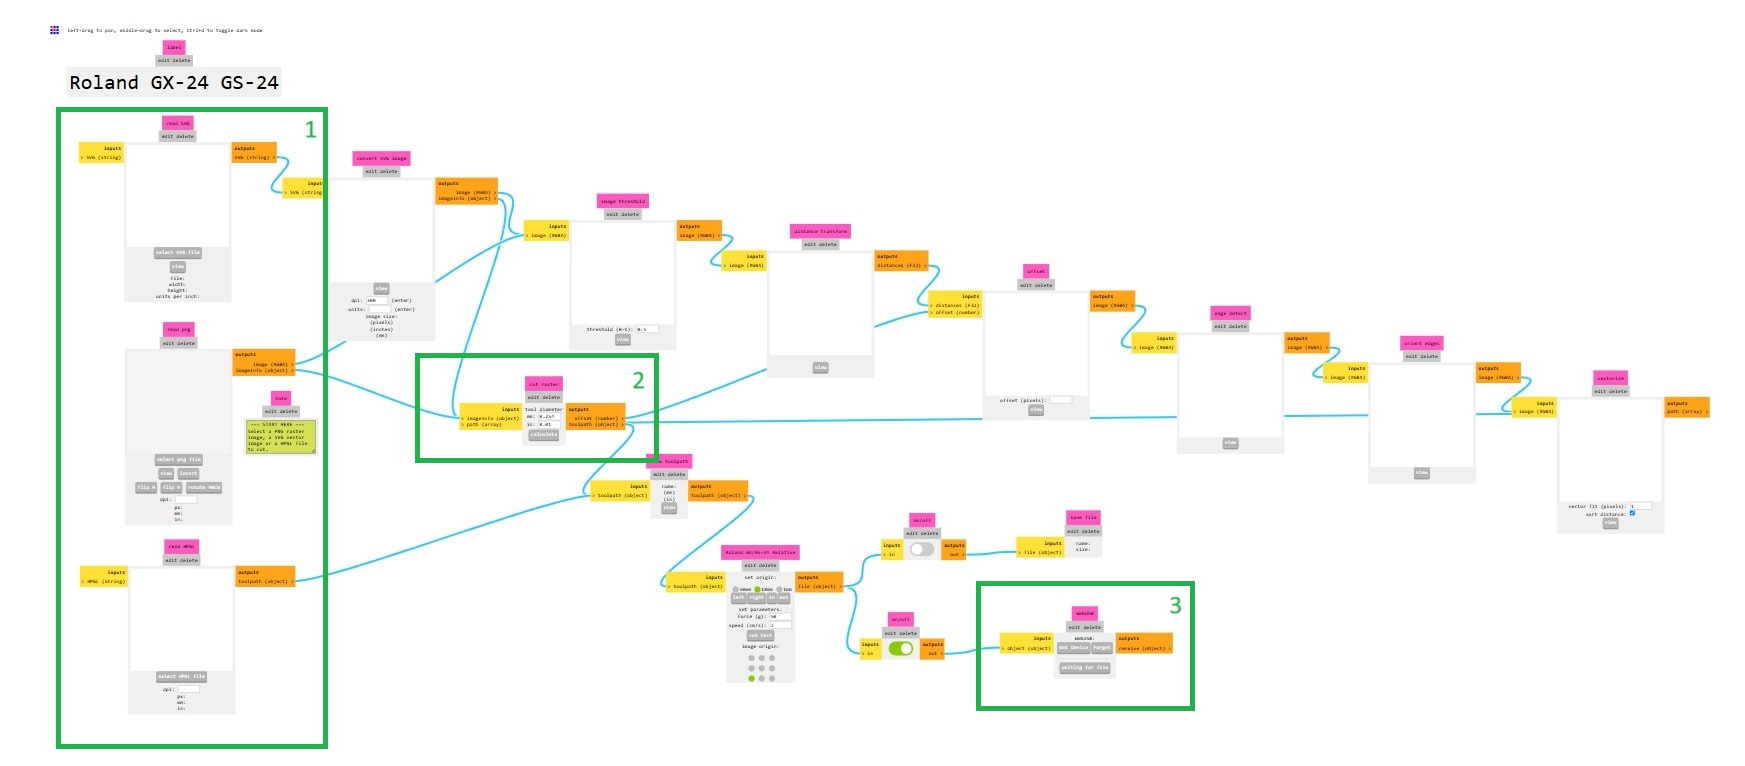
It looks complicated at first glance, so I've framed a few of the elements.
Section 1: Here is where you can uplad your file depending on what format it is in.
Section 2: Calculate - this button needs to be pressed for the cut to be calculated.
Section 3: Virual USB - By pressing the button in this window you can connect the browser witht the printer wirelessly. It is important to note that this is only possible when using the browser Chrome.
You also need to adjust the forc(g). THis can be done on the machine or in the program.
It did not work to cut with this when Henk was showing it to us so we moved on to another machine, but by the end of the day Sam had it working.
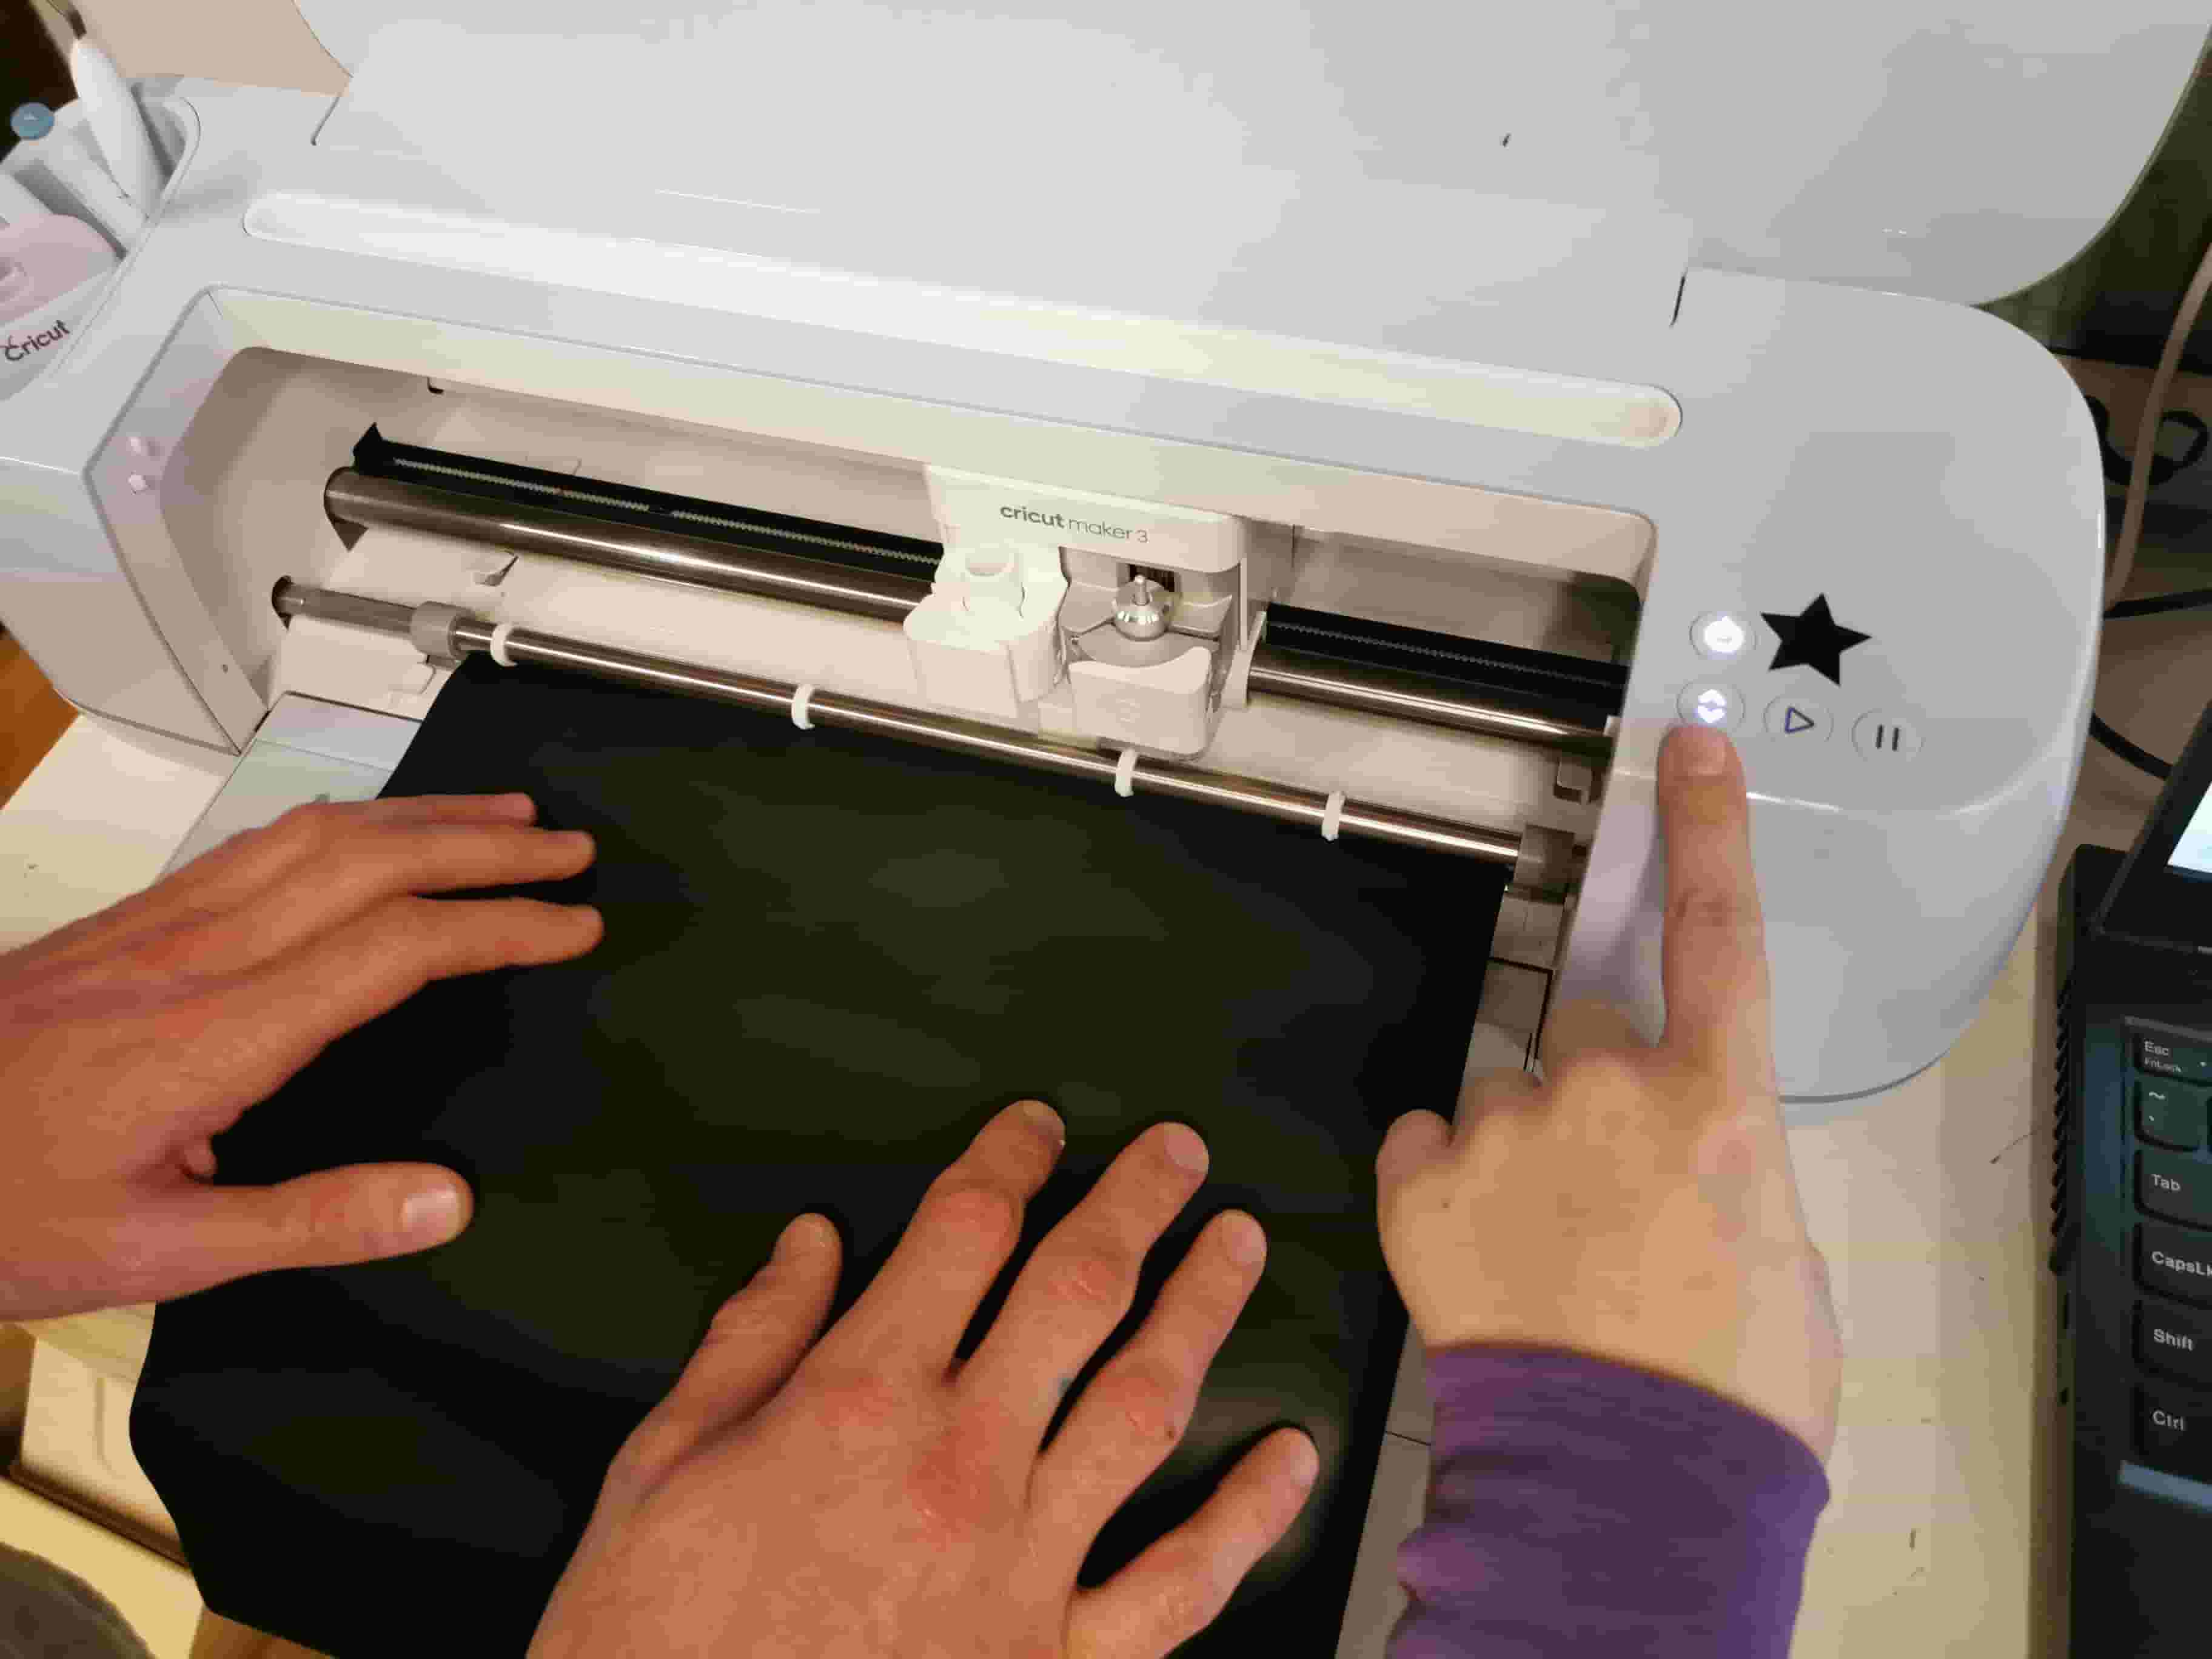
Vinyl cutter 2: Cricut maker 3
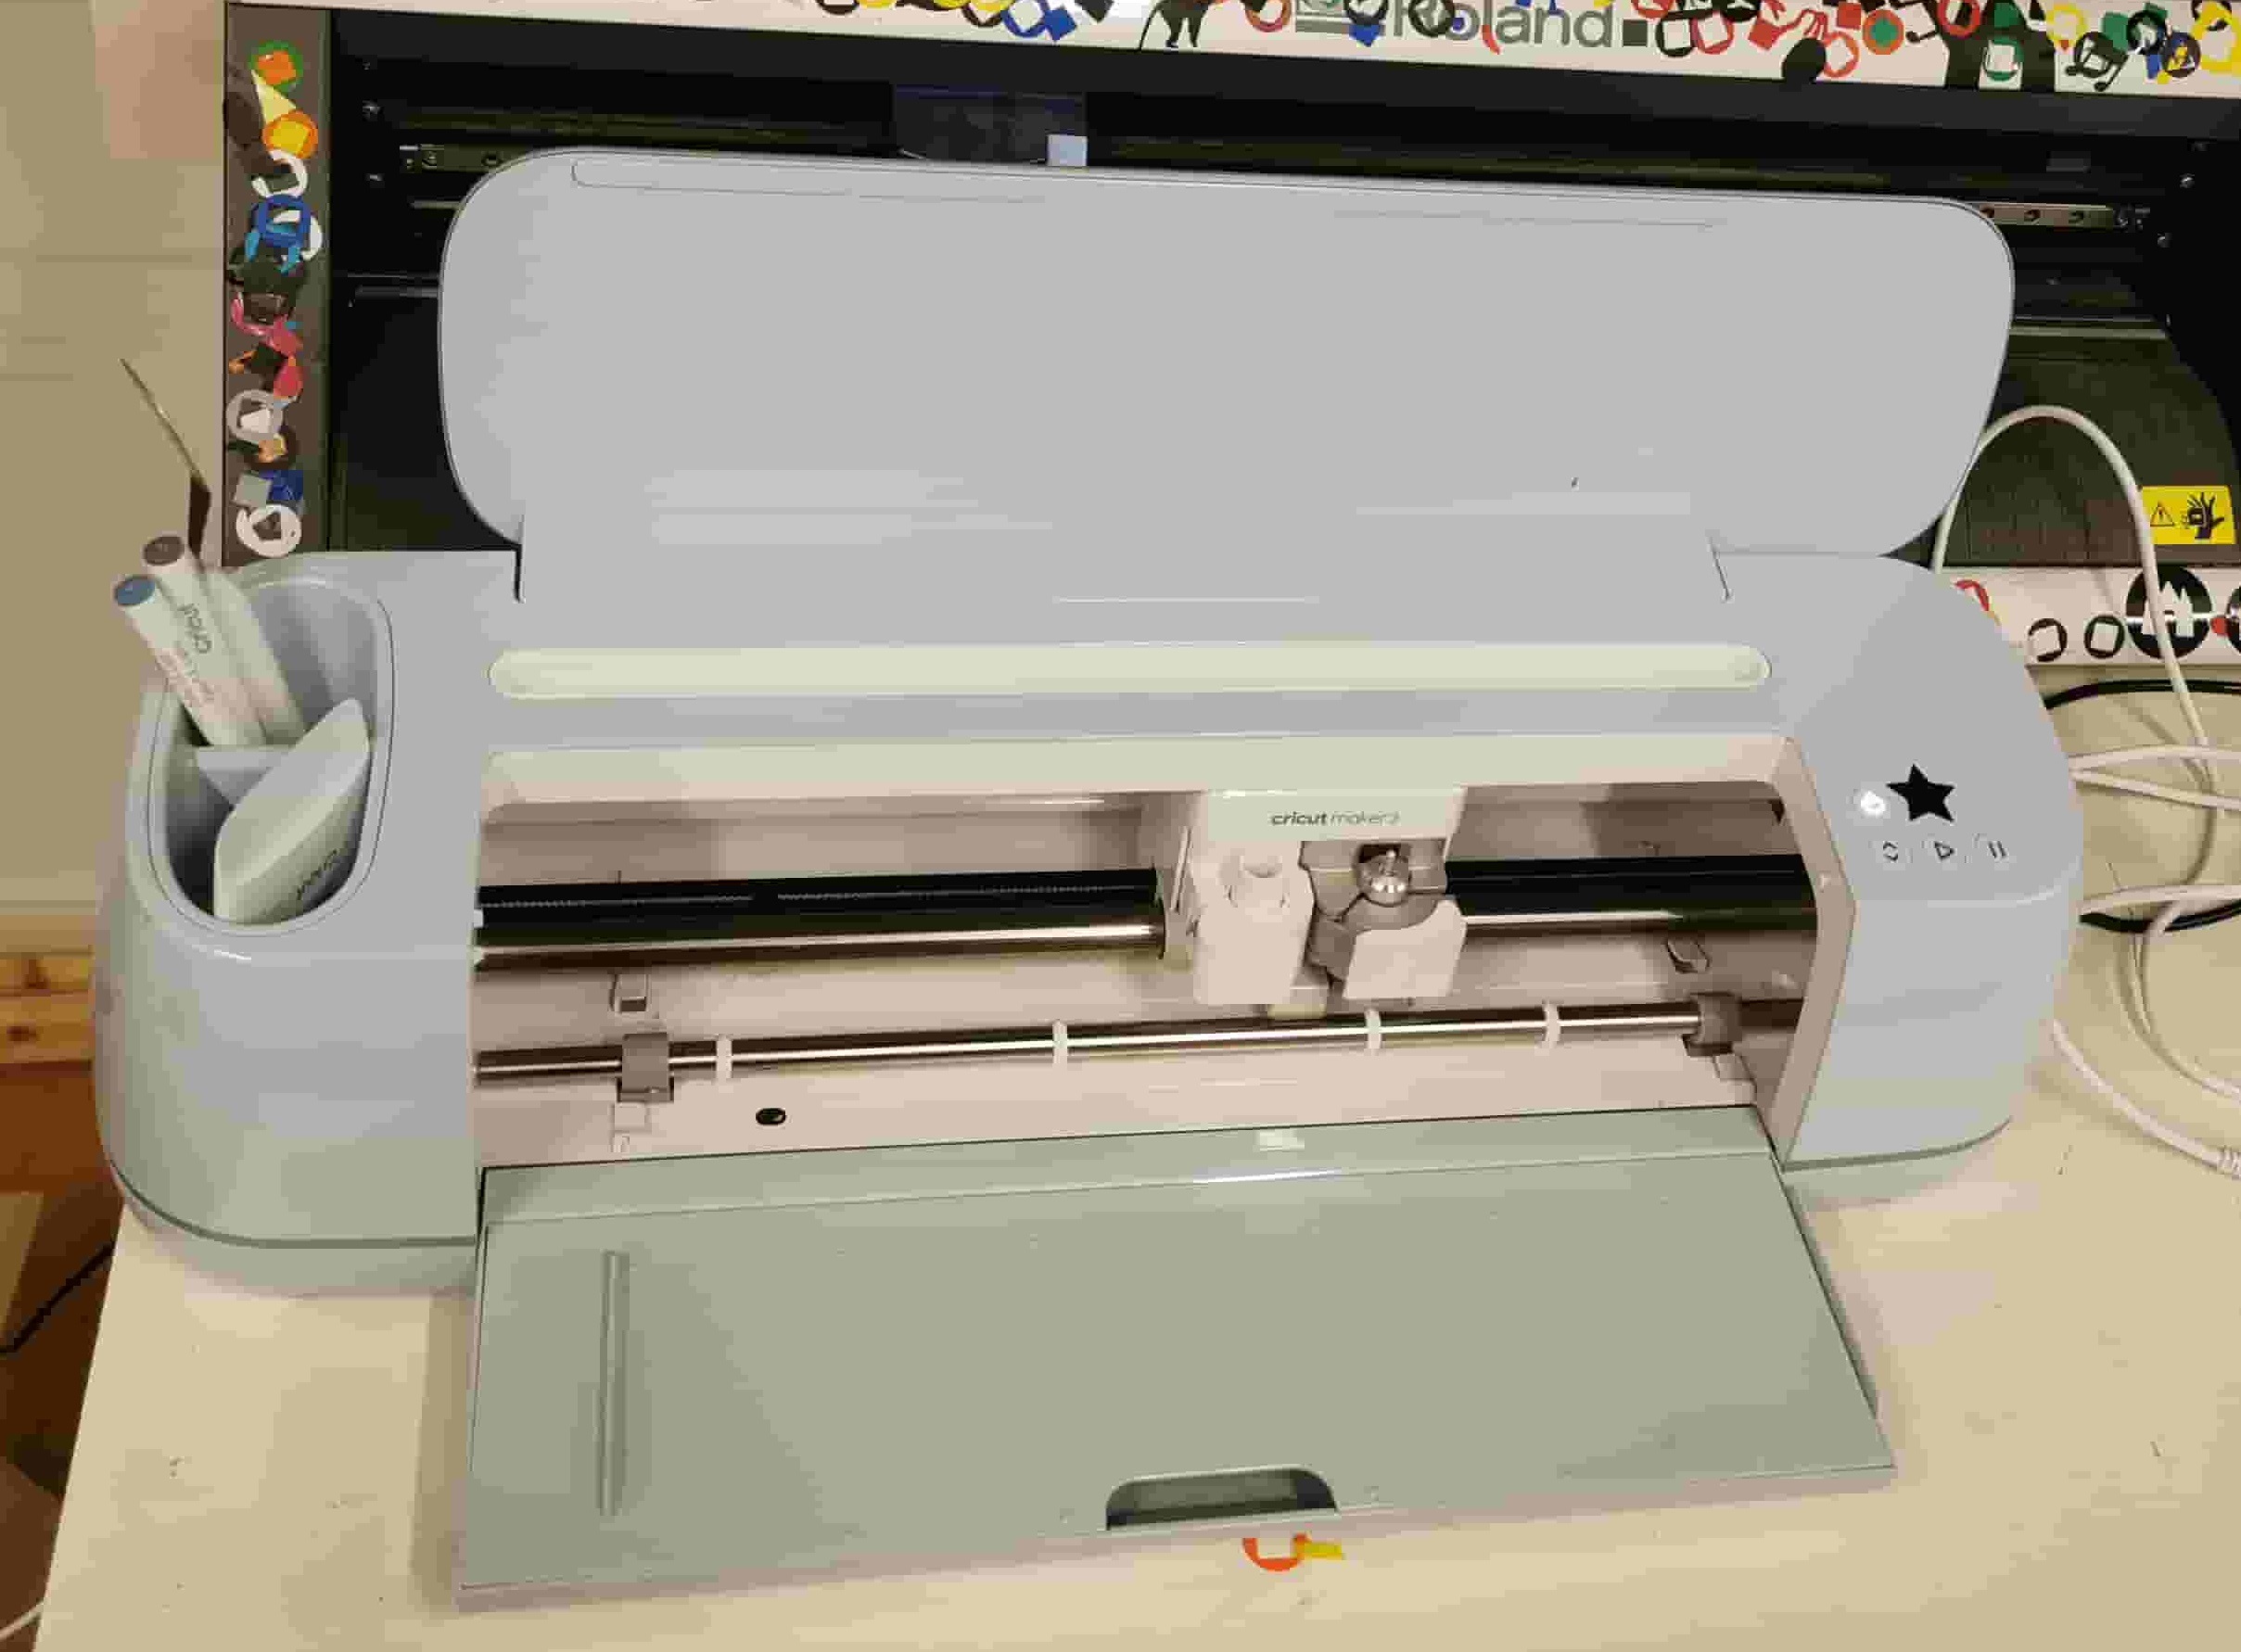
Since we couldn't make the Roland vinyl cutter work Henk pulled out the less liked closed source cutter Cricut maker 3. To use this printer you firt need to log on to Cricuts website and create an account. You can then download the program and connect the cutting machine to your computer.
The Cricut maker 3 uses the same knife blade as the Roland GX-24. A rotary blade that will punture the vinyl and then rotate around itself as it gets moved on the X axis and the vinyl itselft moves along the Y axis.
To use this machine I went to the website linked above and created an account. This has to be done with your email and once yhe account is set up the CriCut program can be downloaded. As it launches CriCut you can click on create test project and that is what we used for the first sticker.
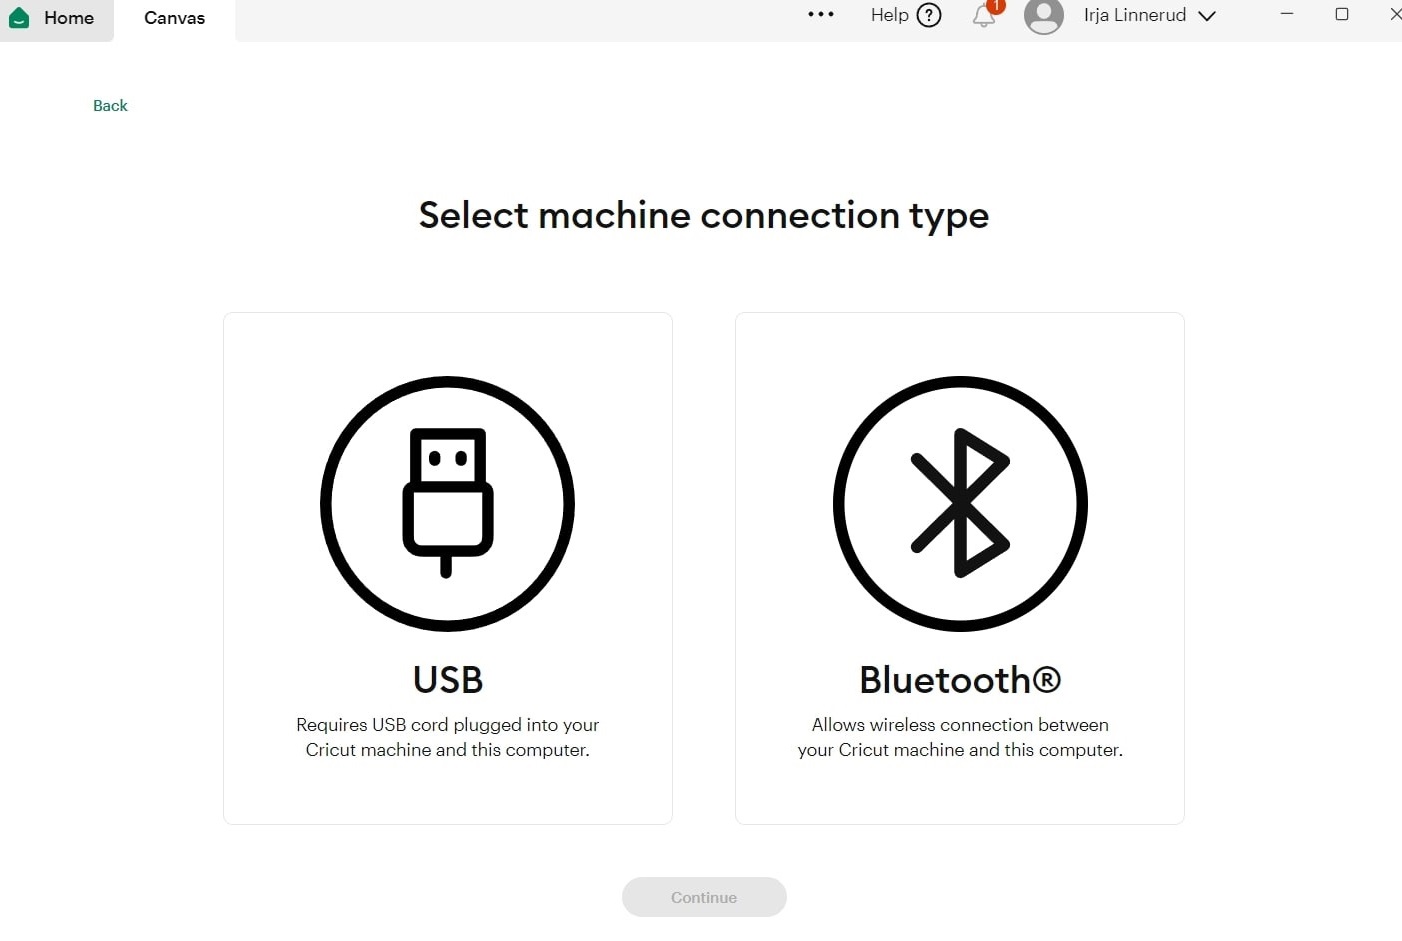
This machine can be connected through USB or Bluetooth. I used USB the first time, but after that it automatically connected wirelessly.
There are 4 buttons on the right side of the machine:
On the top: On button
Left: Load / unload button
Middle: Start button
RIght: Pause button (we did not use this one)
Vinyl level 1: Henkette name sign
We first ran a test print we constructed in Cricuts software. For this print we put the vinyl to be around 32 cm wide so it could be grabbed by the rollers on the side.
It worked! But we did remove the heart shape first and it would have been better to first get rid of the letters before lifitng the heart. It was a bit tricy to remove them in the air.
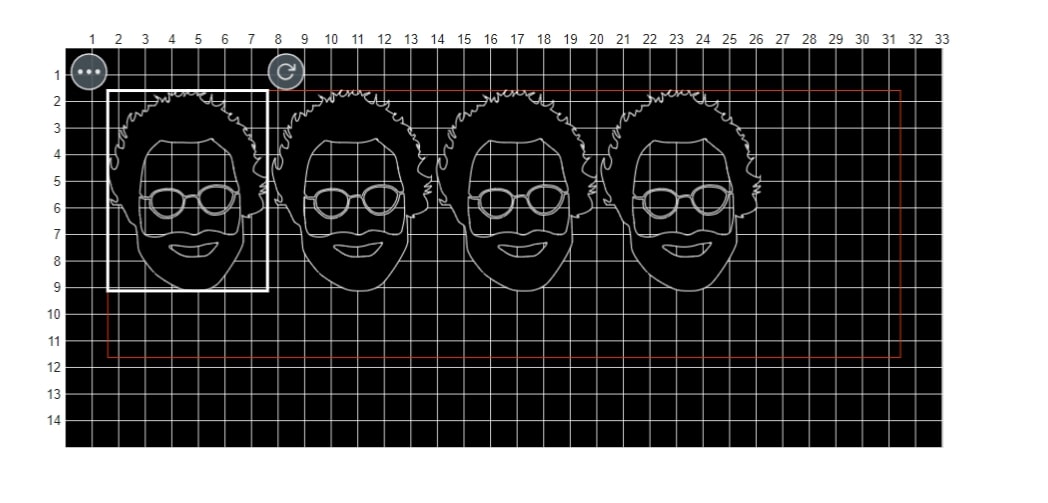
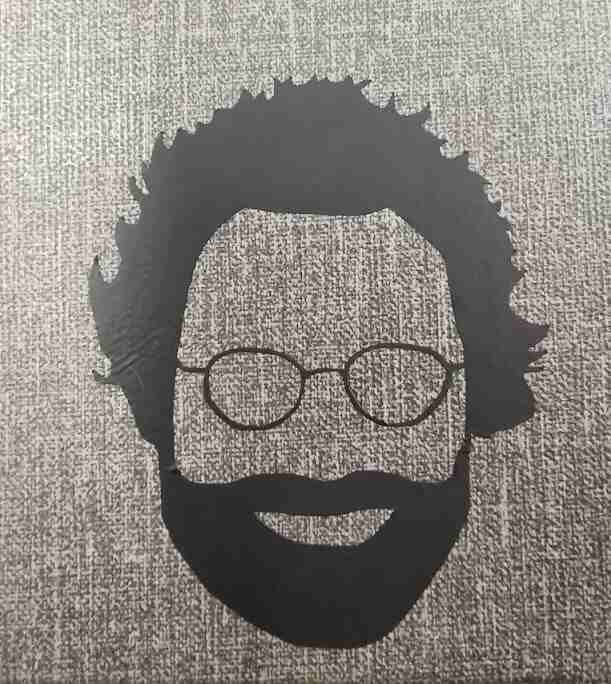
Vinyl level 2: Portrait of Niel
Dylan had the idea to cut a sticker of Niels head. TO do this we first needed an outline. I therefor found and image of him online and traced it it Adobe Illustraitor.
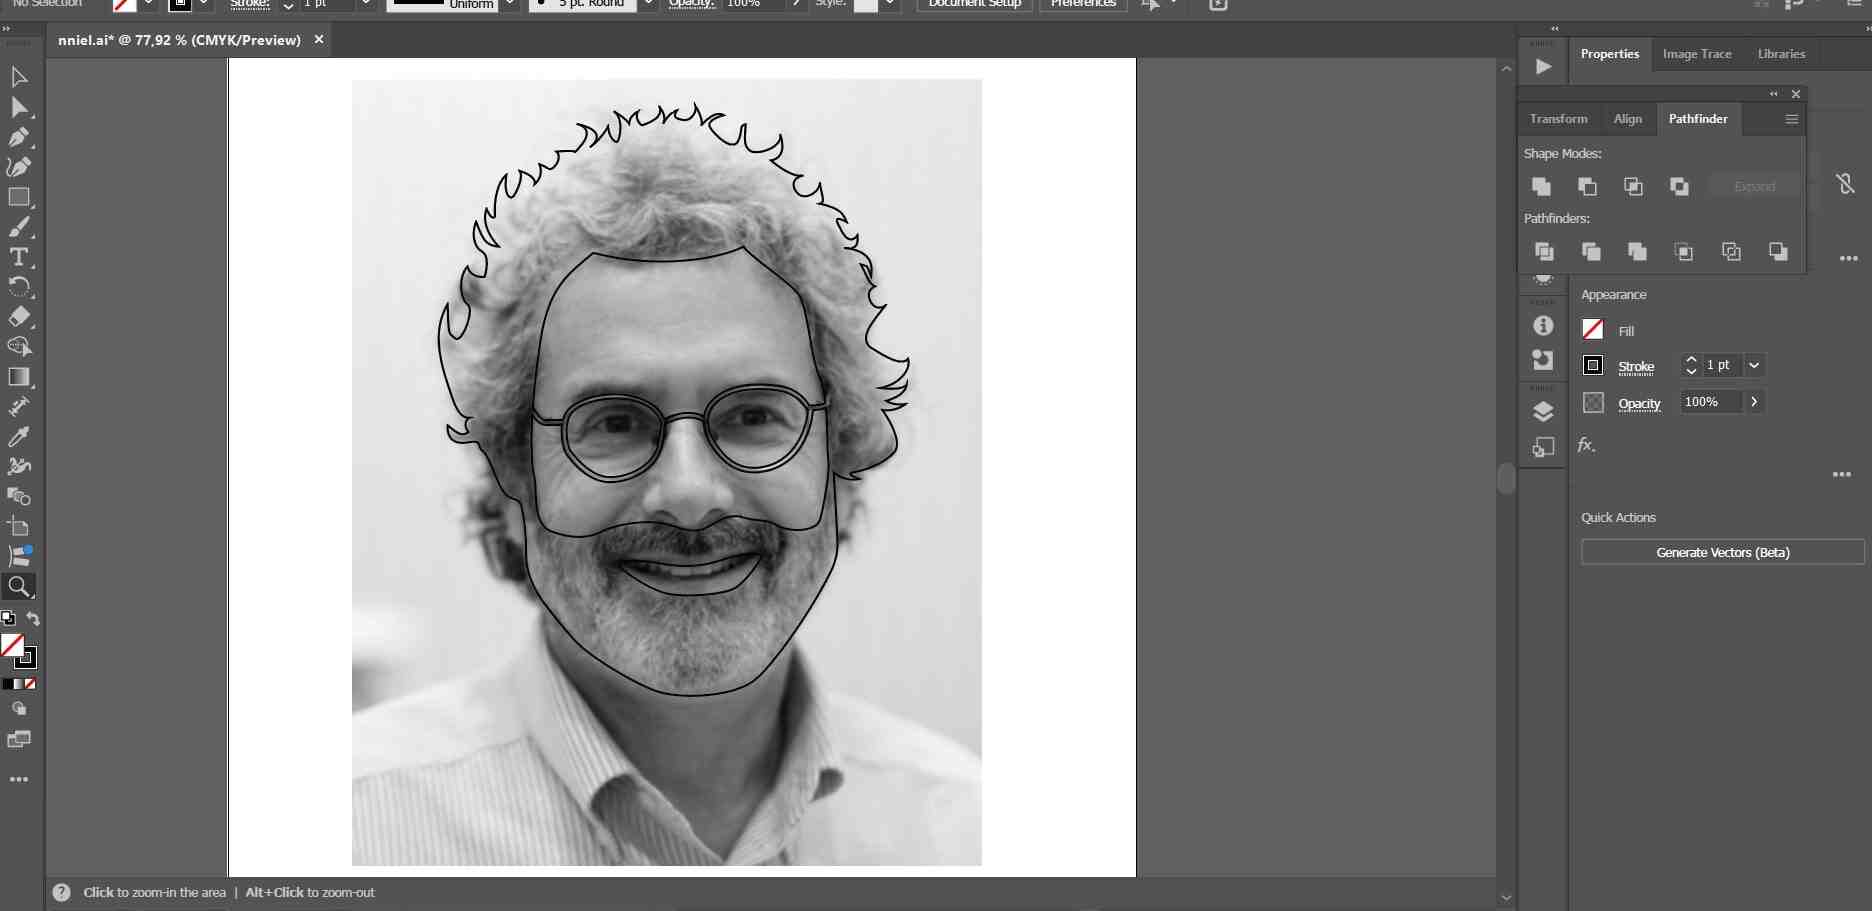
For this cut I put 4 Niels next to each other so we could all share them. The cut worked fine.
The glasses were a bit thin and took some finesse to not break then when removing the sticker from the background.
Henk suggested using a tranferpaper next time and challenged us to do a multicolor print and test this technique out.
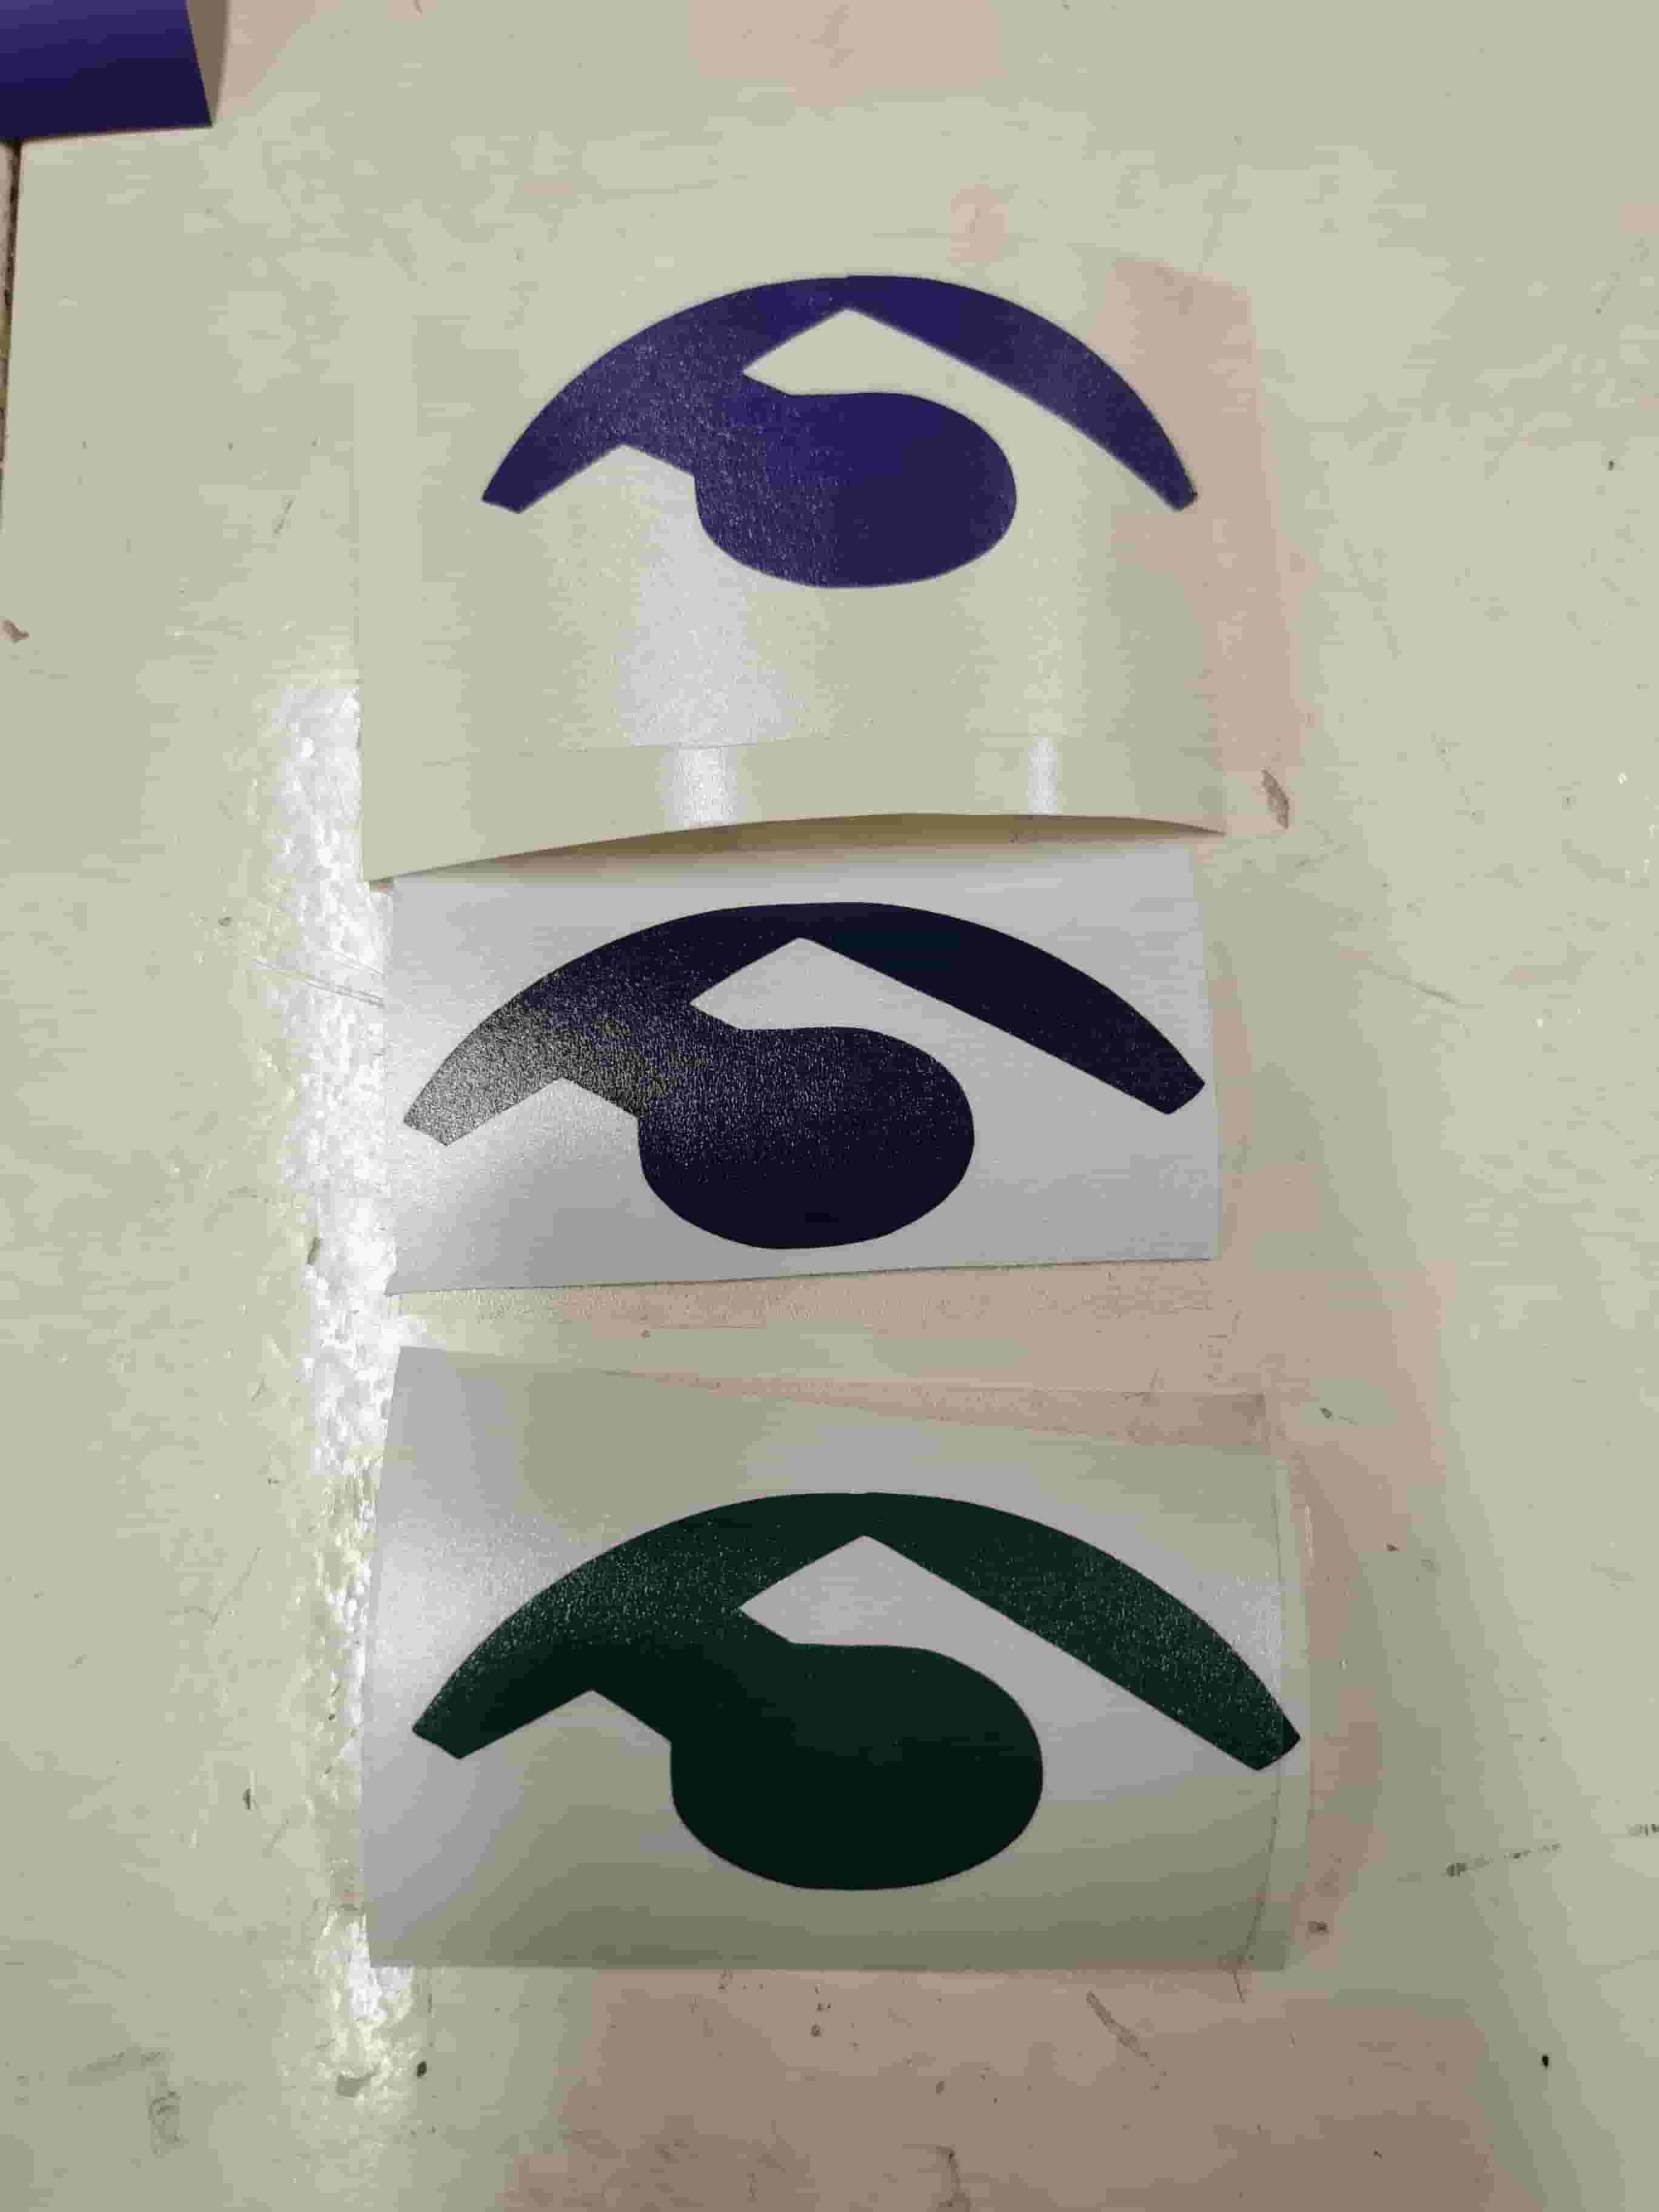
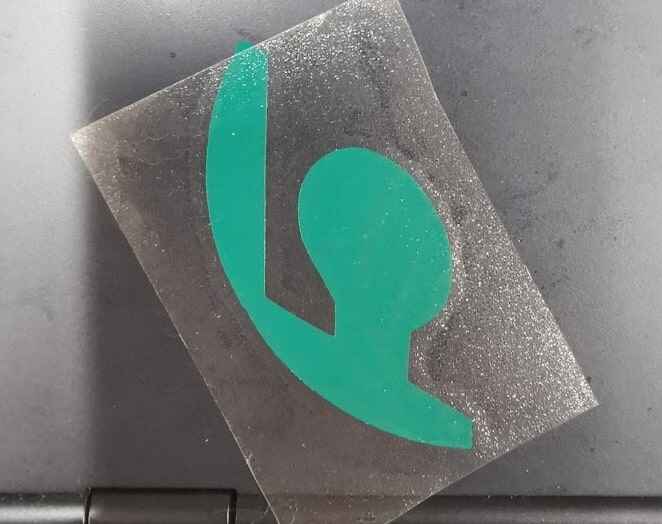
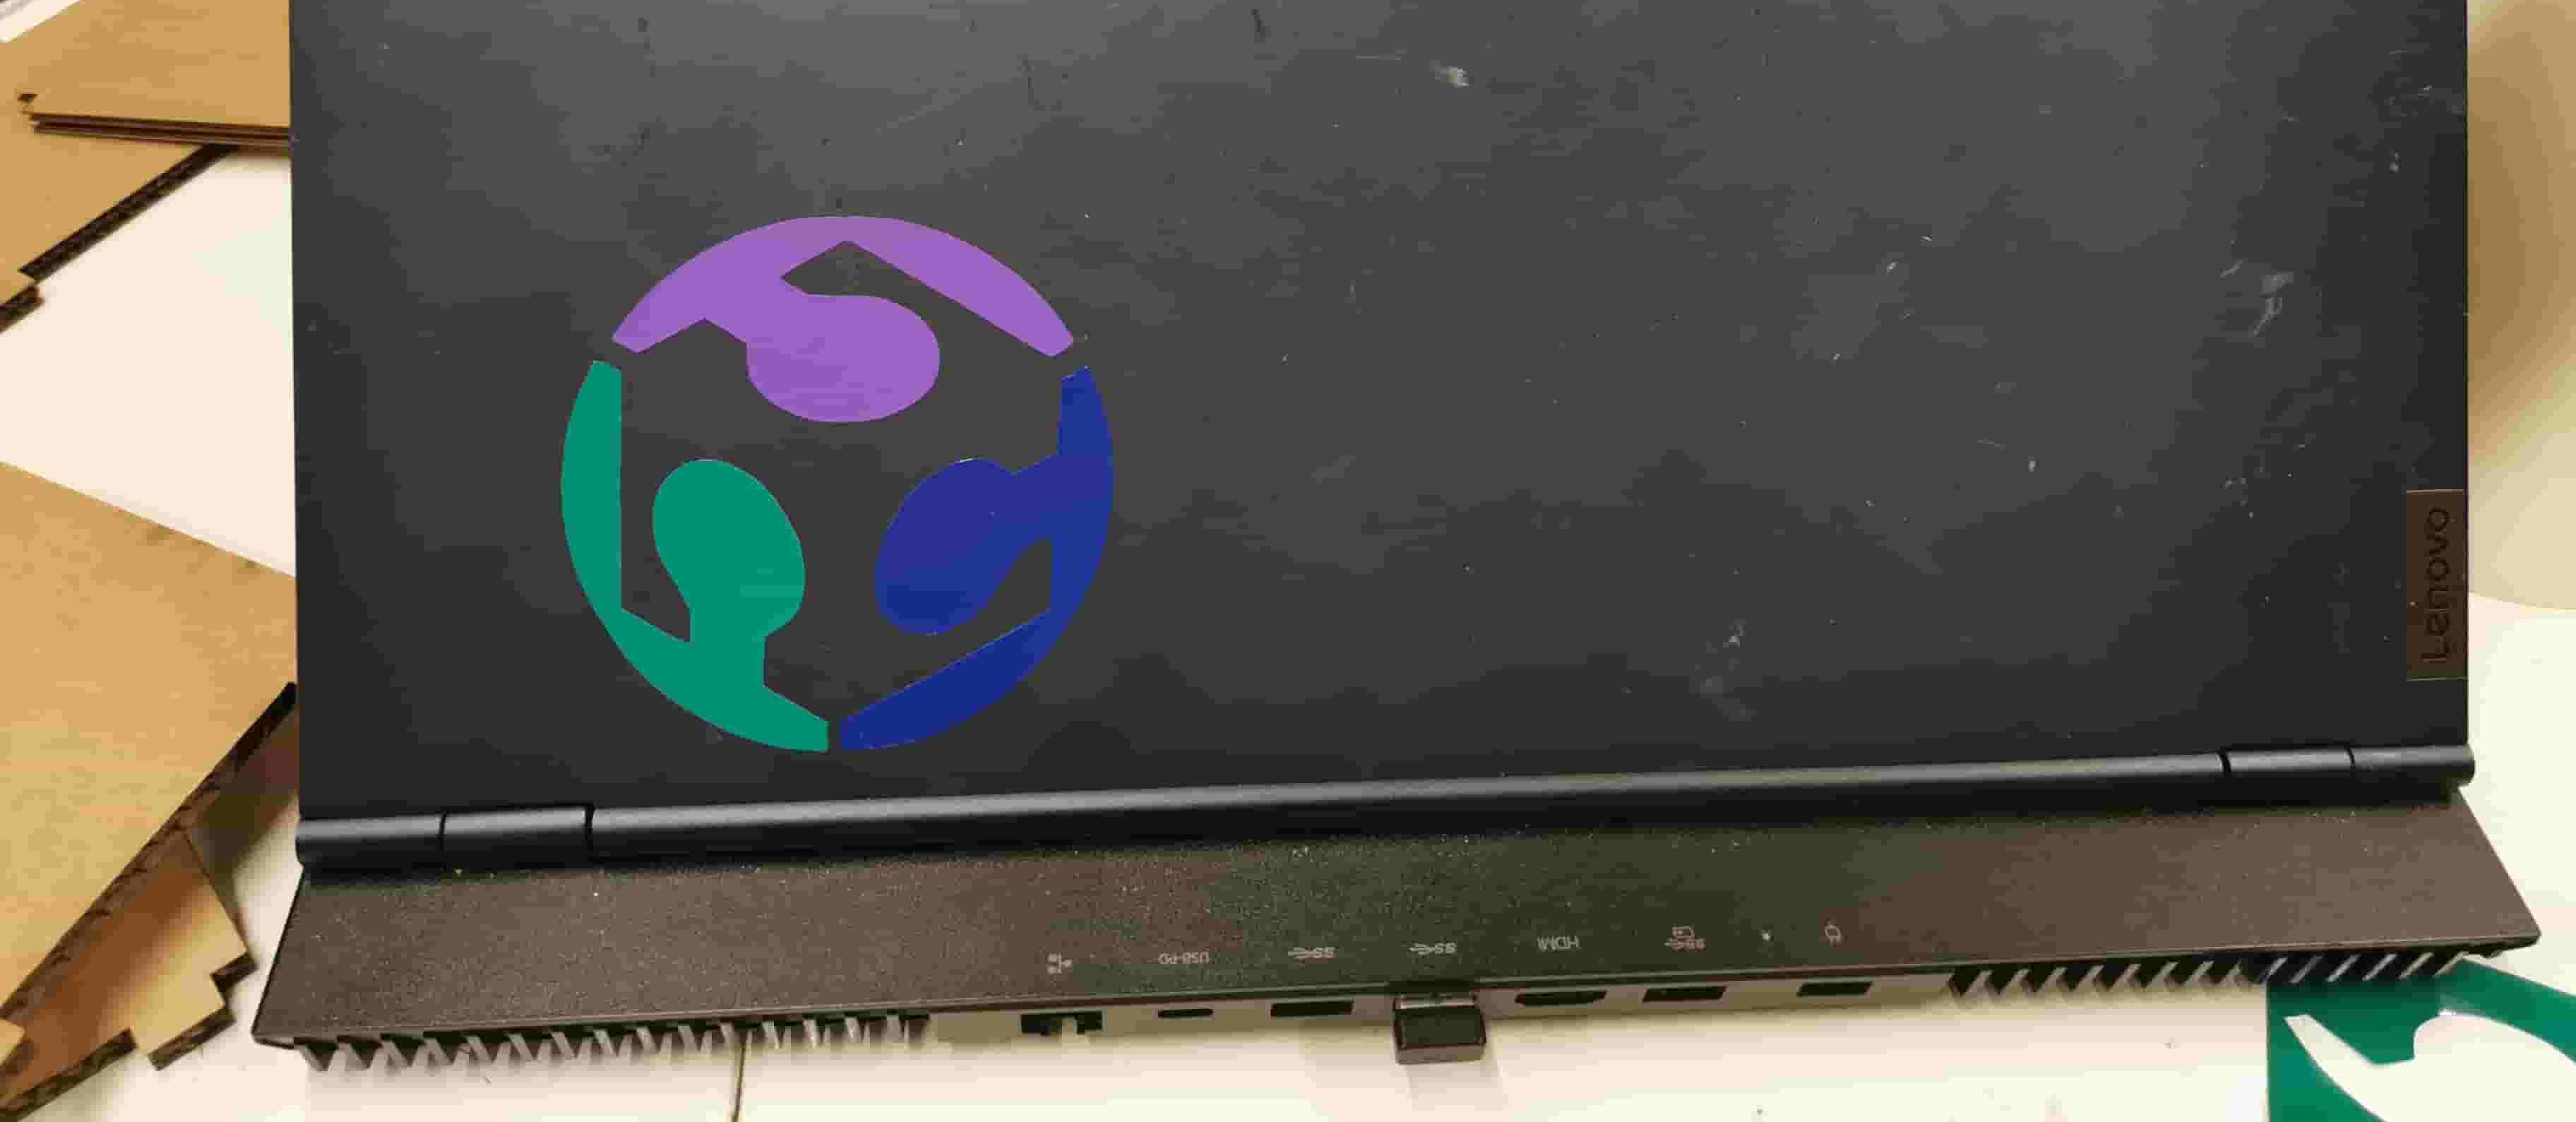
Vinyl level 3: Multicolor sticker
For the multicolor test the FabAcademy logo seemed a good option. I found a file of it online and autotraced the pieces in Adobe illustraitor. Since the logo consists of 3 equal parts I removed 2 of the sides.
I exchanged the red color in the logo with purple, since I like this color better. The Vinyl was just a bit too short for the cutter, but this could be solved by using a mat. When using the mat I would also use shorter strips length wise and that saves some material waste. When applying the vinyl to the mat make sure to rub it onto the mat and heat it up a bit. Then it will stick better. Select the mat options in the settings on the Curcuis software before.
The next step was to remove the extra material around the logo pieces and cover them with pieces of transfer paper.
I ligned the 3 pieces by eye and while it's not perfect, I'm happy with it.
Useful Tools: DeepNest - open source tool for netsing Origami suimulator Bent wood lasercutter