Management and Git
This week the plan was to get familiar with git and set up a documentation page for the next 6 months.
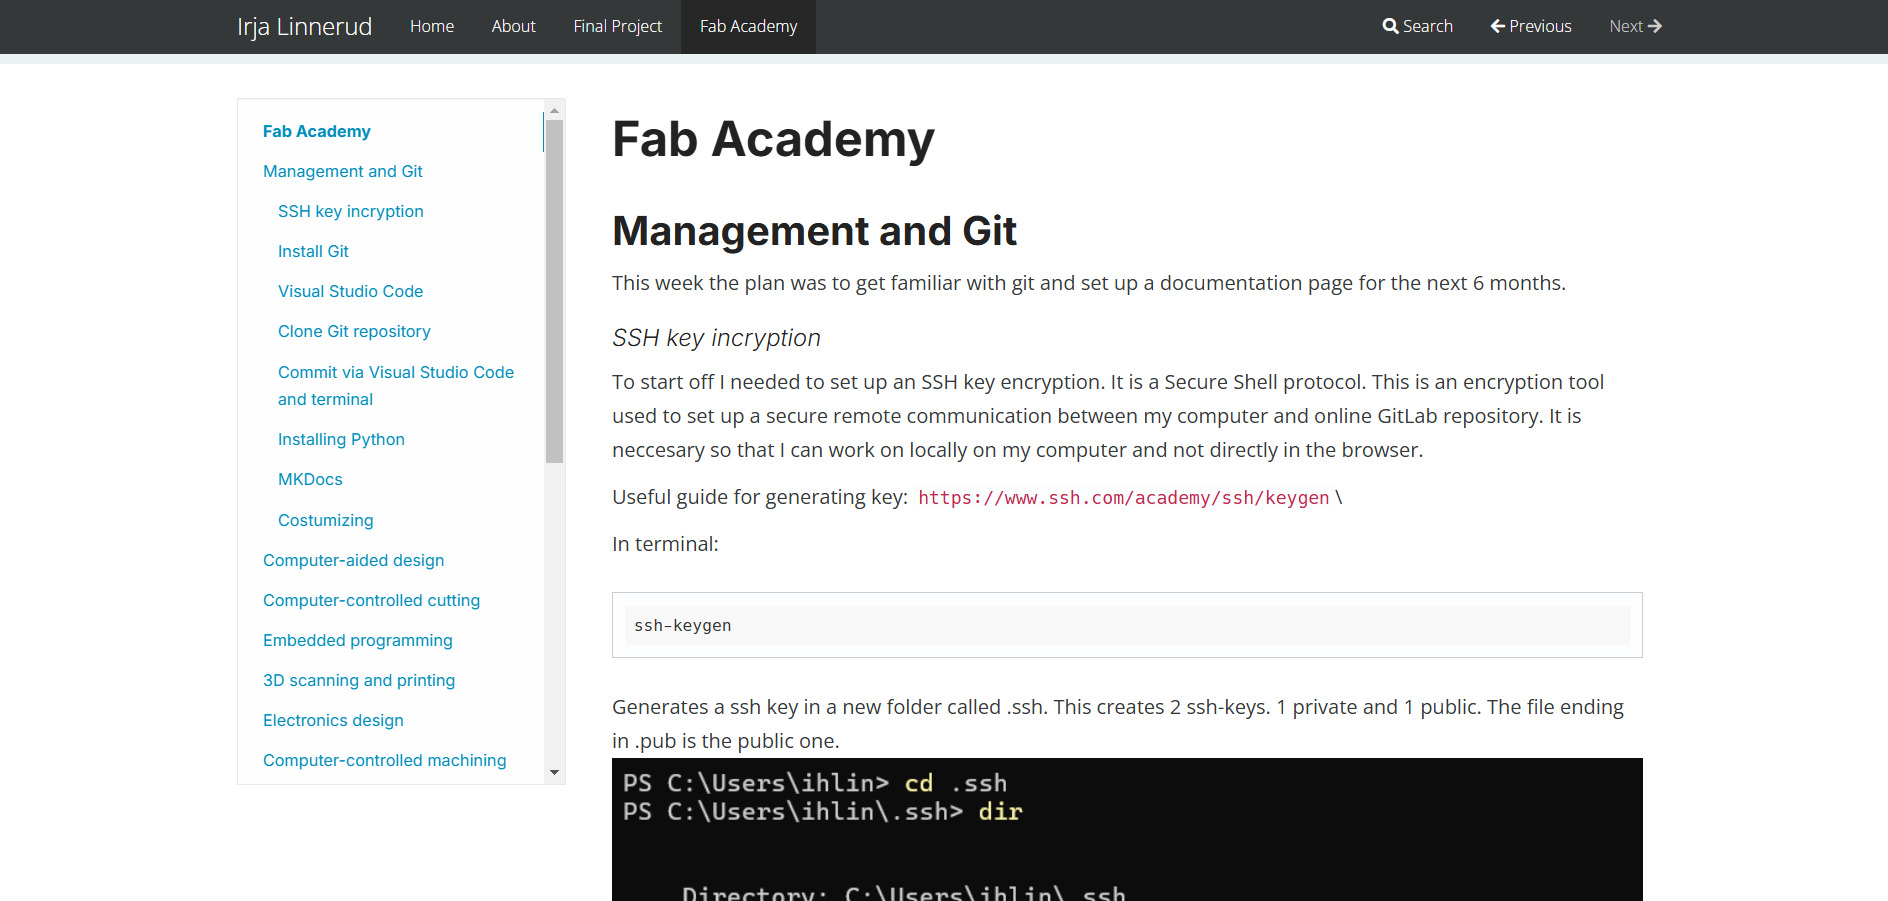
SSH key incryption
To start off I needed to set up an SSH key encryption. It is a Secure Shell protocol. This is an encryption tool used to set up a secure remote communication between my computer and online GitLab repository. It is neccesary so that I can work on locally on my computer and not directly in the browser.
Useful guide for generating key: SSH keygenerator
In terminal:
ssh-keygen
Generates a ssh key in a new folder called .ssh. This creates 2 ssh-keys. 1 private and 1 public. The file ending in .pub is the public one.
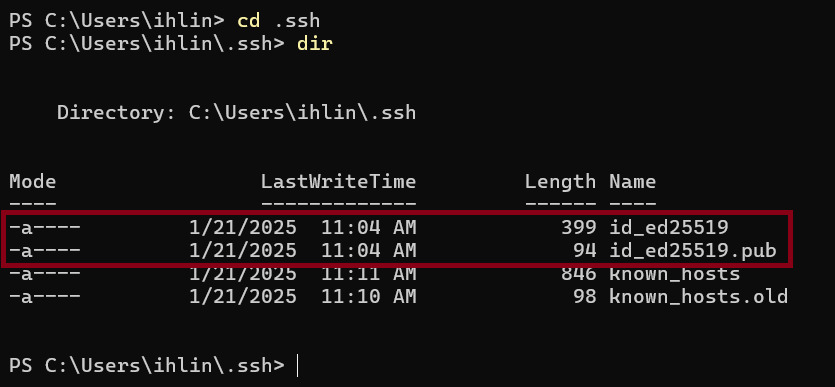
To copy the key go to the .ssh folder and write
cat id_ed_25519.pub
Then I could copy the key (3rd line in the image below)

To exchange ssh key with GitLab I went to my gitlab repository. Clicked on my user icon, then SSH Keys and finally new key where I pasted the public key and added it.
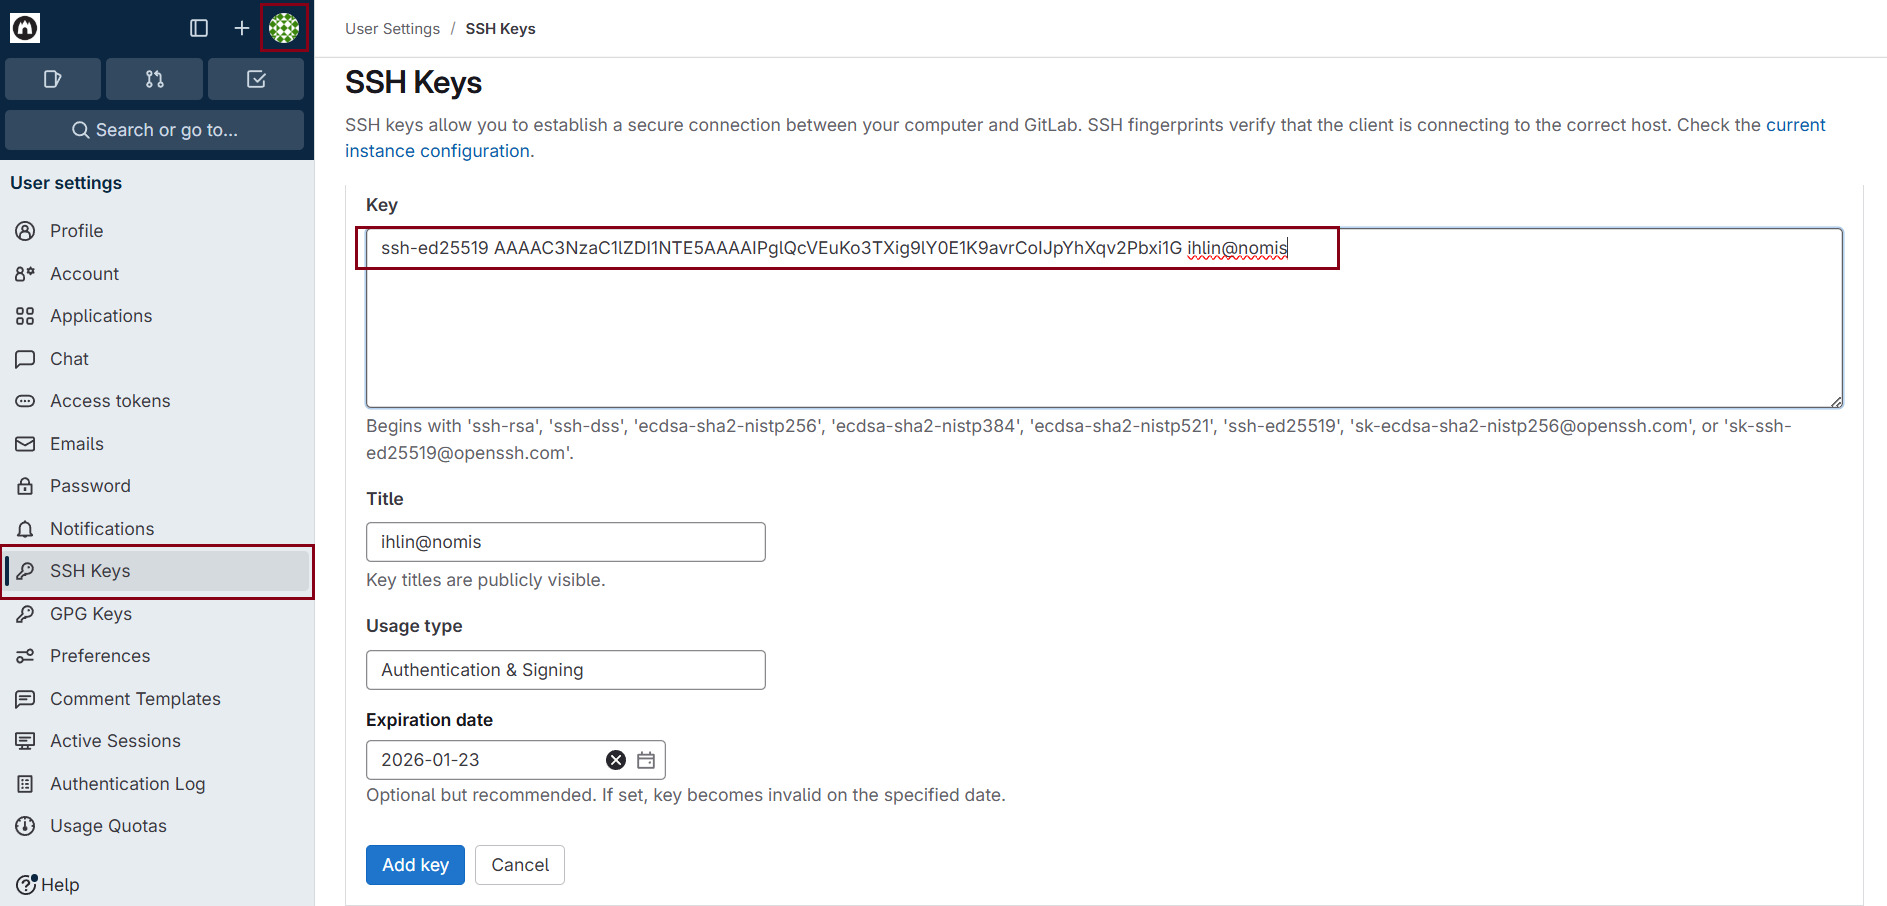
It was now added to my keys in GitLab.

To test if the connection is working go to terminal and write
ssh git@gitlab.waag.org

Install Git
To install git on windows I used the terminal. Michelle helped me with this.
winget install --id Git.Git -e --source winget
Visual Studio Code
Visual Studio Code is a text editor I will be using during this internship. It will be used to update the documentation webside locally before pushing it online. I already had Visual Studio Code installed.
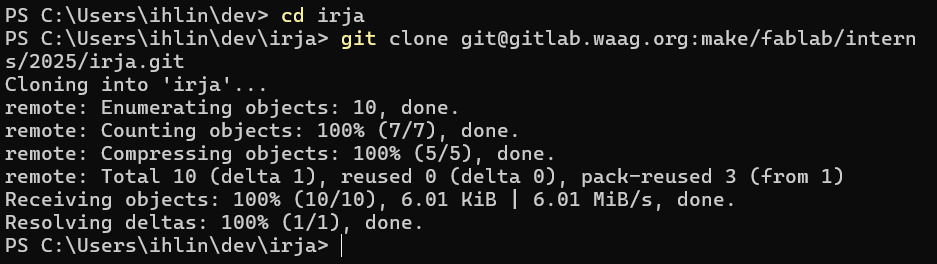
Clone Git repository
To clone my online git repository to a local drive I went to my git repository, clicked code and copied the line under clone with SSH.

TThen went back to the terminal and created a dev folder. Inside the dev folder I cloned the repository with the line:
git clone git@gitlab.waag.org:make/fablab/interns/2025/irja.git
Commit via Visual Studio Code and terminal
Via Visual Studio Code (VSC)
To commit from Visual Studio code make sure that all the files are edited, just click save all under file.
Then click the brach icon on the left side of the screen. There will be a blue dot there with a number in it if there are new changes made that has not been commited yet. Then write what changes has been make in the message section. It is important to remeber to do this. If not VSC will not be able to commit. After filling in the message click commit, followed by Sync Changes. The program will then inform that with will push and pull form main, click OK. The local repository is now synced with the one on GitLab.
It is a bit lenghty to commit via Visual Studio Code so I prefer push from the terminal.
Via terminal:
git add *

git commit -m 'message'

git push
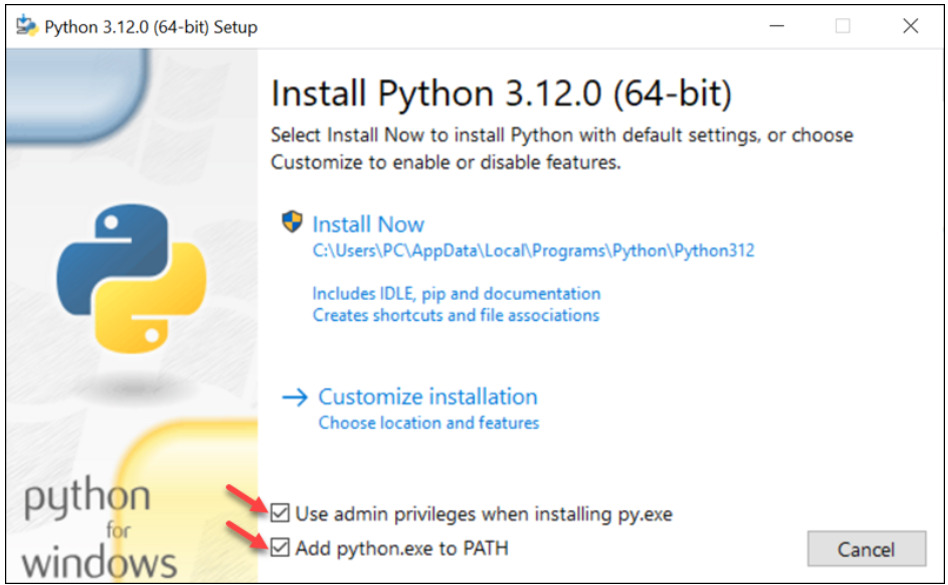
Installing Python
Next up was to install python I used this guide: Install python guide
When installing it was importan to make sure to install as administraitor. To do this I clicked the two boxes shown in the image below.
To check that python is installed:
python --version
Now check that pip is installed aswell. It should have gotten installed along with python. Pip will be used later to install MKDocs.
pip --version
They should both display what version is installed.
MKDocs
KMKDocs is a static site generator which I will use for my documentation. THe upside of using a static site generator is to siplify the process. It uses templates to genrate an full static HTML website from raw data. Meaning that once I hace set it up I only need to worry anbout the content I put in and not the formatting of it. Since I have no experience with this from before I am very happy for any tools to make documentation faster and simpler!
To install MKDocs with pip open the terminal and write:
pip install mkdocs
To check that MKDocs was installed correctly:
mkdocs --version
To add MKDocs to the git repository, I went to the forlder where my clone was, and use the command:
mkdocs new irja

This created a few mkdocs files in my repository.
- a mkdocs.yml file
- a docs folder containing an index page
In order to connect with GitLab I also needed a ci file. I added a file named .gitlab-ci.yml containig:
image: python:3.11-slim
before_script:
    # install Git for the mkdocs revision plugin
  - time apt update && apt-get install -y git
    # Install mkdocs and theme
  - time pip install -r requirements.txt
test:
    stage: test
    script:
    - time mkdocs build --site-dir test
    artifacts:
        paths:
        - test
    rules:
      - if: $CI_COMMIT_BRANCH == $CI_DEFAULT_BRANCH
        when: never
pages:
    stage: deploy
    variables:
        ENABLED_GIT_REVISION_DATE: "true"
        GIT_DEPTH: 0
    script:
    - time mkdocs build --site-dir public
    artifacts:
        paths:
        - public
    rules:
        - if: $CI_COMMIT_BRANCH == $CI_DEFAULT_BRANCH
I also added a requirements.txt file. Originally this contained the template material. I wanted to choose a different theme.
Here is a website with a few themes to choose from: https://github.com/mkdocs/catalog
I have here replaced material it with cinder. The versions were also stated at the end of each line. This created a problem with the pipeline and after removing them it now works as it should. I am not completely sold on the way cinder looks yet, but hopefully some costumisation will improve the look of this site.
mkdocs
mkdocs-git-revision-date-localized-plugin
mkdocs-awesome-pages-plugin
mkdocs-cinder
Here is a website with a few themes to choose from: https://github.com/mkdocs/catalog
In order to install cinder I typed in the terminal:
pip install mkdocs-cinder
Now that the new theme has been stated in the requirements and insatlled it also needs to be implemented in the mkdocs.yml file.Here I replaced material with cinder.
theme:
    name: cinder
Within docs I could now start creating my pages and added a few new pages. The file structure was now:
Irja
    docs
        about.md
        finalproj.md
        index.md
        weeks.md
    .gitlab-ci.yml
    mkdocs.yml
    README.md
    requirements.txt
Costumizing
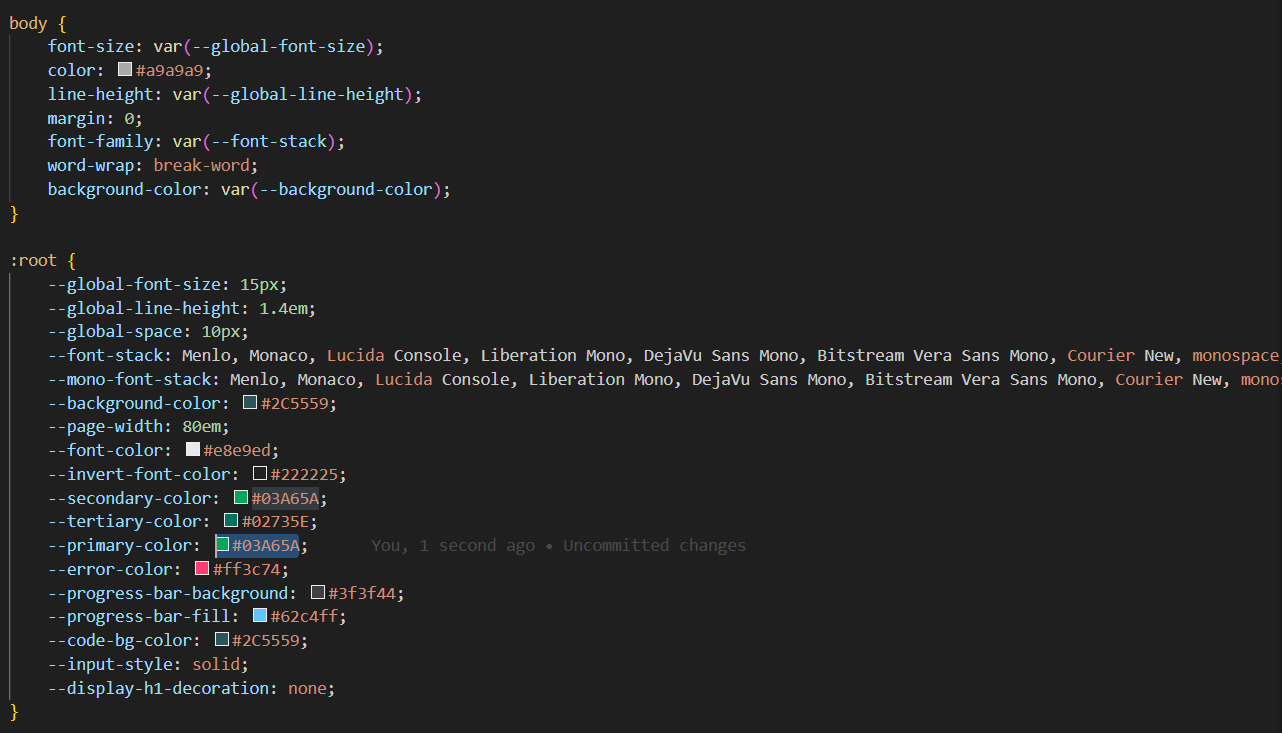
To adjust the appearance of my site I needed a css file. I have no prievious experience with this, but luckily for me Dylan had spent his weekend setting up a website and could assist me.
I needed to create a folder within docs called stylesheets and within there a file: extra.css. And here I could start making changes to fonts, colors and adjust the setup.
Irja
    docs
        assets
            images
                ssh.jpg
        stylesheets
            extra.css
        about.md
        finalproj.md
        index.md
        weeks.md
    .gitlab-ci.yml
    mkdocs.yml
    README.md
    requirements.txt
Here is what the website currently looks like:
Let's see what can be done about this. I got a good tip from Michelle that if I host the website locally and press Shift + Ctrl + I and look at the source code of the site there is a small icon on the top left part of the window as shown in this image:

When this icon is clicked I can hover over and click parts of the website and see where in the source code these settings are set and can change them to test what the effect will be. Very useful!
First I want to try another theme again. To see how easy it is to change. I think the Simple blog looks nice. In Terminal:
pip install mkdocs-simple-blog
Then added the theme to mkdocs.yml aswell as to the requirements.txt file.
I did the same with the theme terminal. I think I like this page more. Here is a link with info from the theme on how to cosumise it: https://ntno.github.io/mkdocs-terminal/
MKDocs terminal
Additions to css
By using the festure mentioned I have been able to adjust basic changes in color and withs of the page by copying in the root from the source code into my css file.
Useful tips for adding elements
[Name to be diplayed](https://www.website/link/) #adding link
 #adding images
#followed by empty line will create a space
Useful teminal
To Push
git add *

git commit -m 'message'

git push
To check status
git status
To host locally
mkdocs serve
To end local sharing
CNTR + C
See differences from online repository and local
git diff
Create new file
mkdir
Images
Max 800 pixels across Make them as small as possible Hard limit: 500 MB per website Image max 150 KB per image
Illustrations
Illustrations will be edited in photoshop to fit the style of the website. They will be: - made in black and white, inverted - new layer added with he color: #2c5559 - color layer set to screen - new layer added witht he color: #2c5559 - color layer set to overlay - a 2nd color layer added in the color: #c4c4c4 - 2nd color layer set to darken color - Exported as jpg in images folder
Example:
Useful links
Git
https://rogerdudler.github.io/git-guide/ Guide